• Home
  • Blog
    • Shop My Favorite Products
    • Shop Weekly Outfits
    • Shop Designs
  • Our Story
  • Contact
Menu

Abigail Amira Home

Simple Lifestyle & Design
  • Home
  • Blog
  • Shop
    • Shop My Favorite Products
    • Shop Weekly Outfits
    • Shop Designs
  • Our Story
  • Contact
IMG_2990.jpeg

Magnolia Wreath Tutorial For less than $15

November 23, 2020

Can You believe I made this gorgeous magnolia wreath for less than $15? I’ll show you how so you can too!

This is not a sponsored post but links contain affiliate links. If you make a purchase through one of my links (at no additional cost to you), I may earn a small commission. Thank you so much for your support!

IMG_1732.jpeg

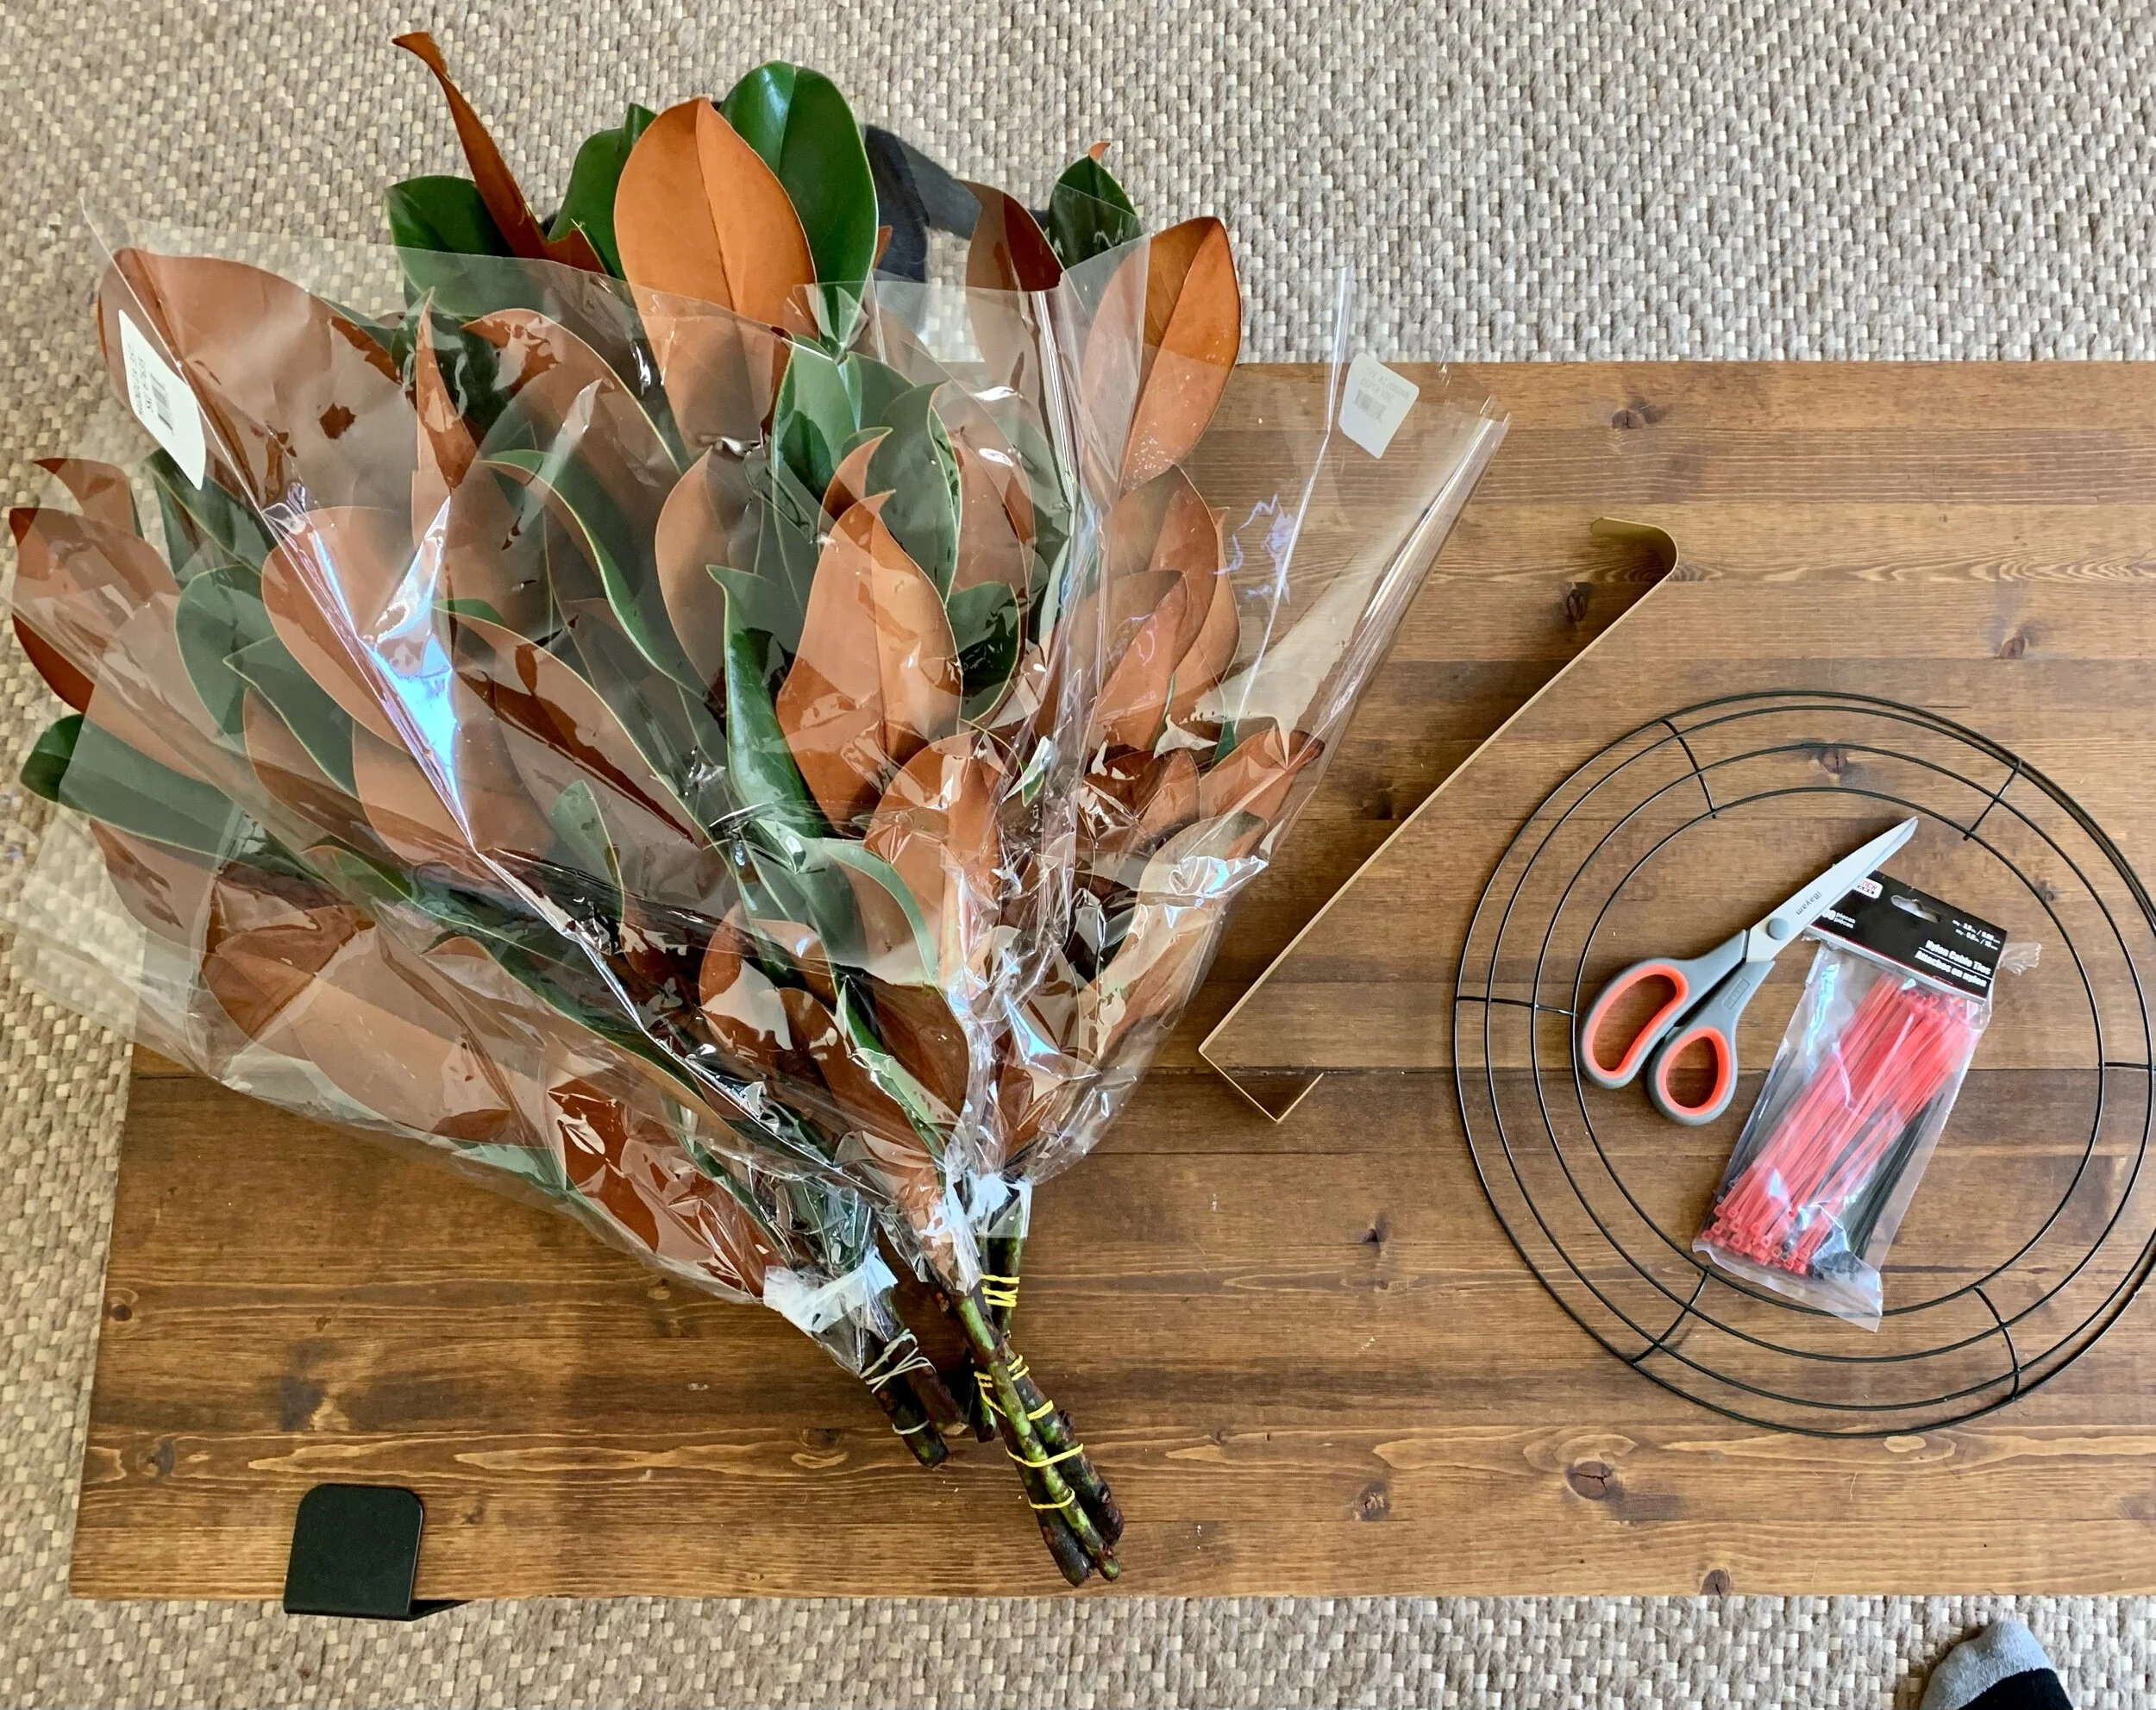
I was at my local Trader Joe’s buying blueberries for the frangipane tart I was going to make later on, when I came across bunches of magnolia branches for just $4.99 each. I immediately knew I wanted to make a wreath with them so I grabbed two. On my way home I stopped by the Dollar Tree and grabbed a wire wreath form, a wreath hanger and zip ties.

 
IMG_1735.jpeg

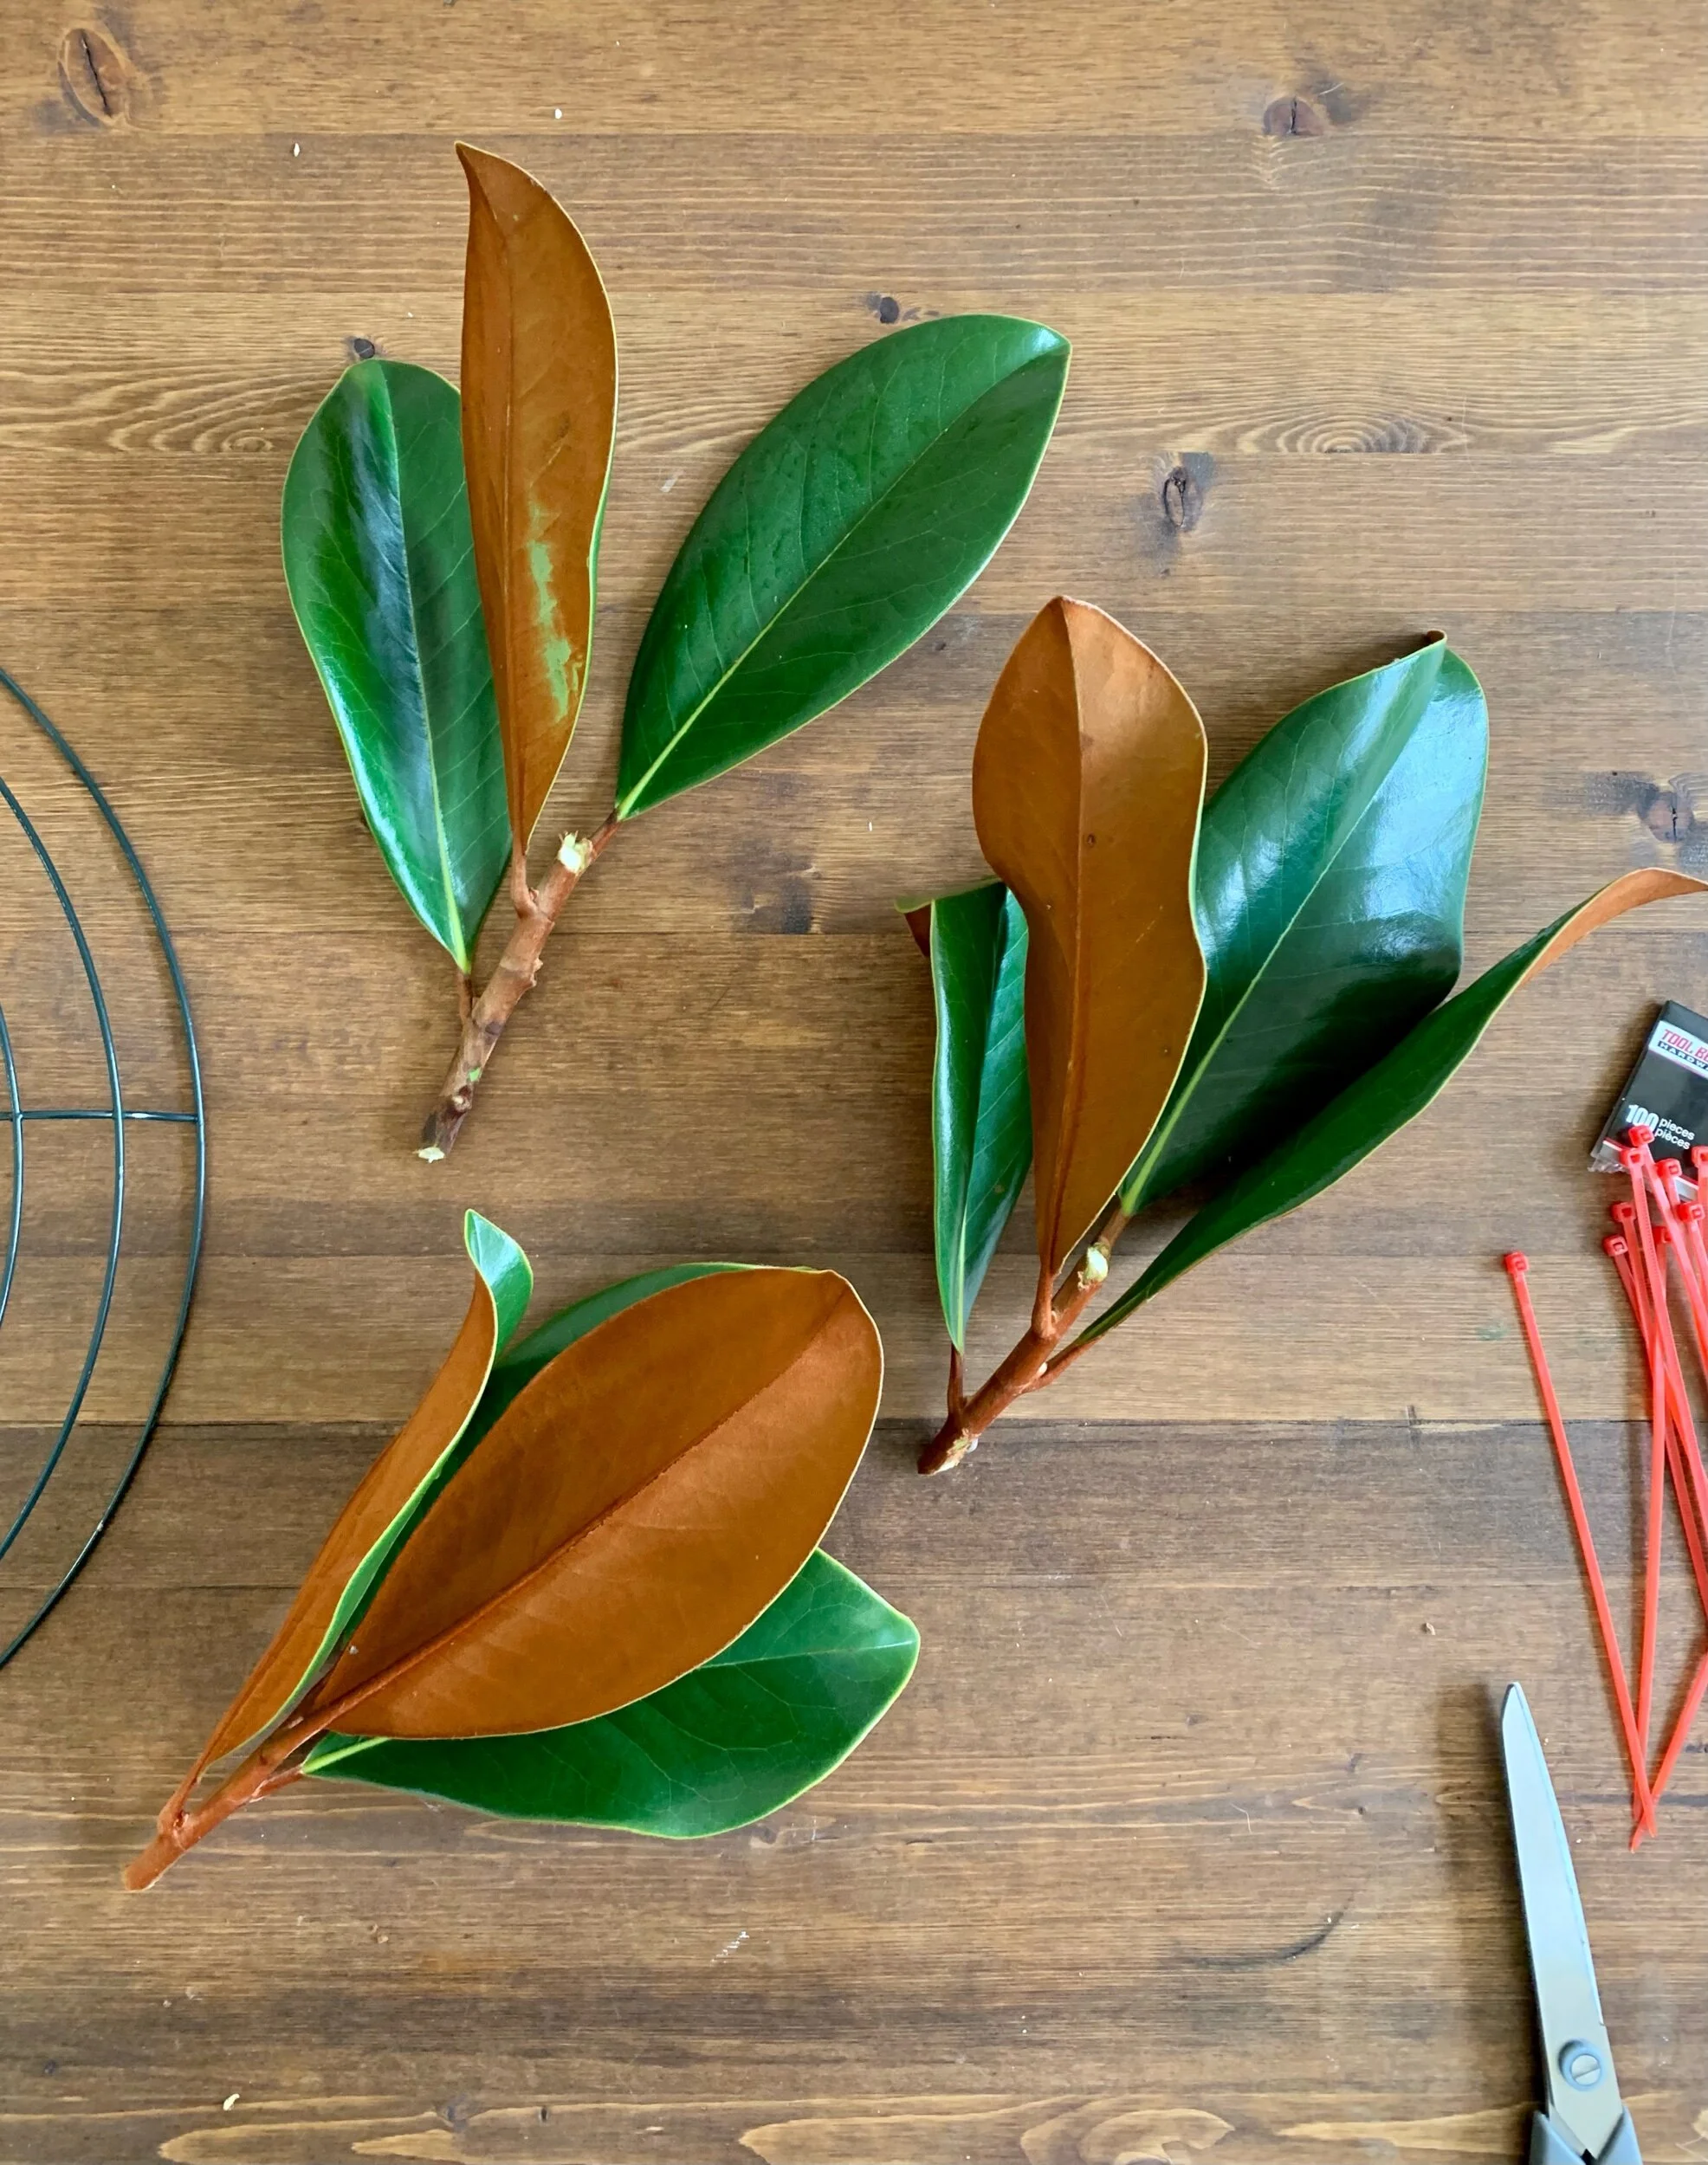
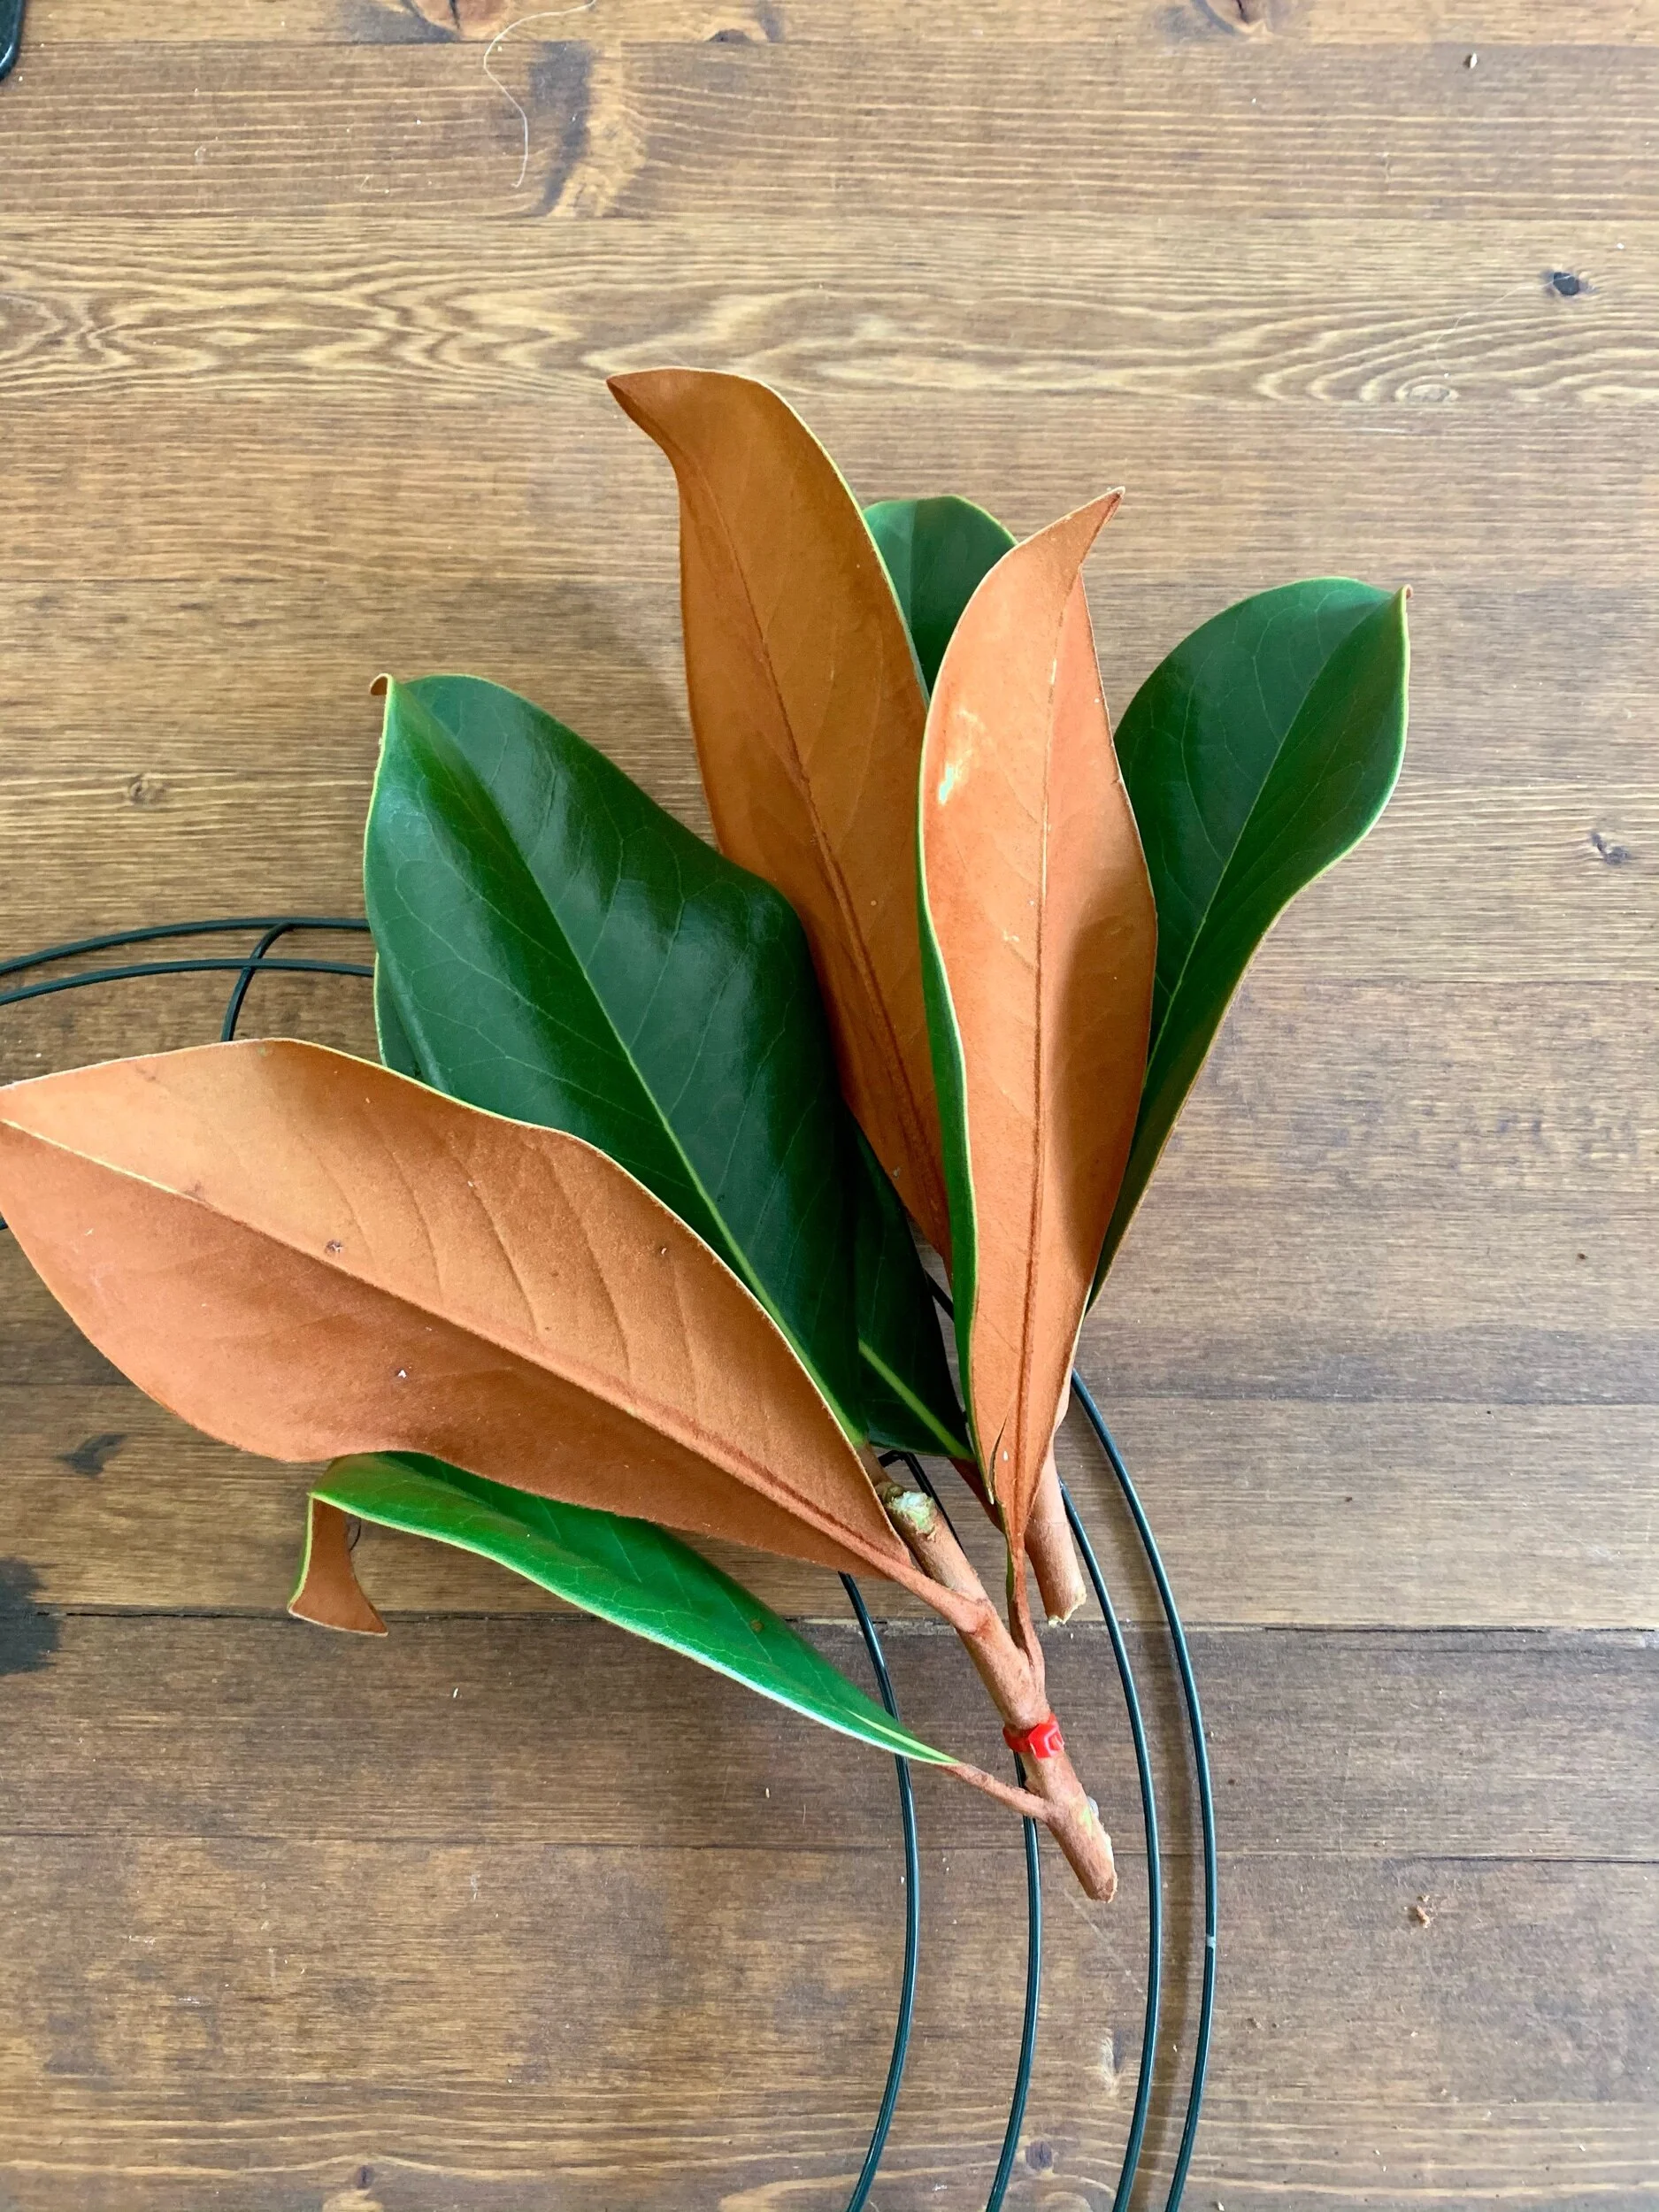
I cut the branches down into smaller pieces to make them more manageable. I aimed for 3 to 4 leaf segments like you see here(Yes, I am using standard scissors instead of my shears. Don’t be like me!).

IMG_1736.jpeg

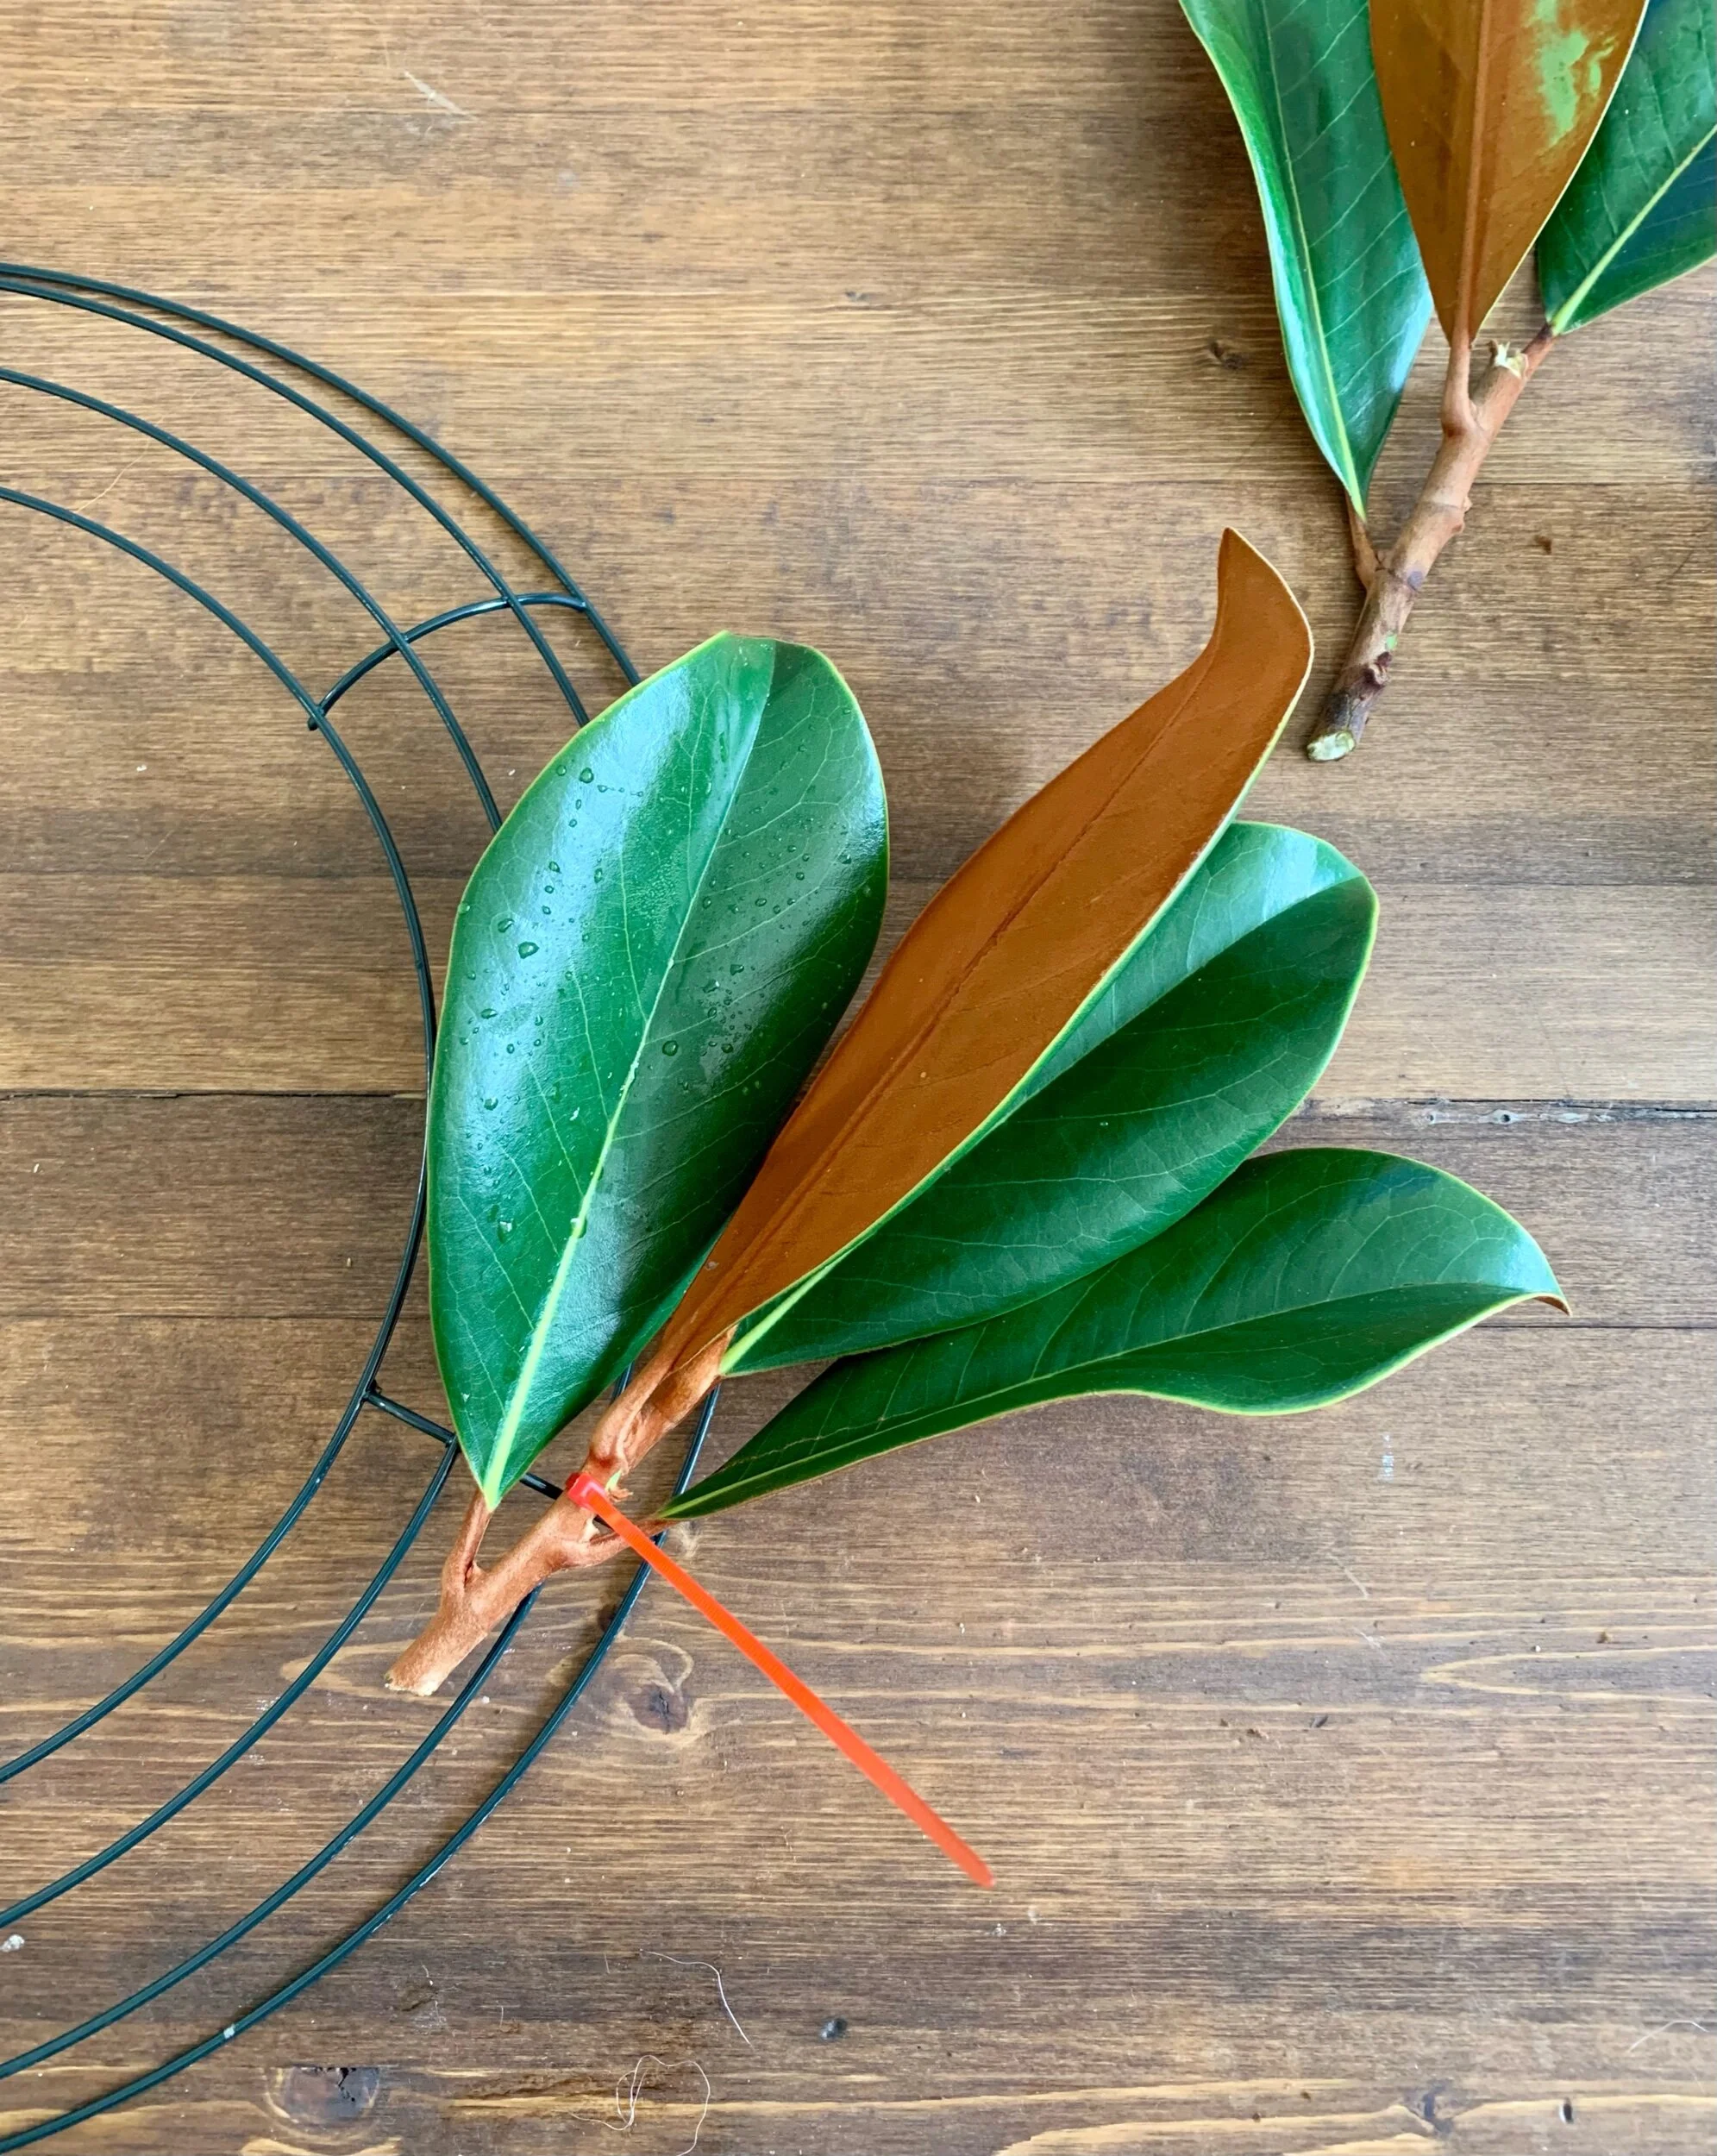
After I trimmed all the branches, I started attaching the individual pieces to the wreath form using the zip ties. I used one zip tie per branch piece, attaching the branch to one wire and making sure it was very tight. Cut off the tail of the ziptie.

IMG_1737.jpeg


I began layering the pieces with a slight overlap so you don’t see the bottom of the branch. I like to alternate the placement with one branch angled towards the right and the next piece angled towards the left like you see here.


www.abigailamira.com

If DIY isn’t your thing, you can buy a fresh one from Williams Sonoma here.


IMG_1738.jpeg

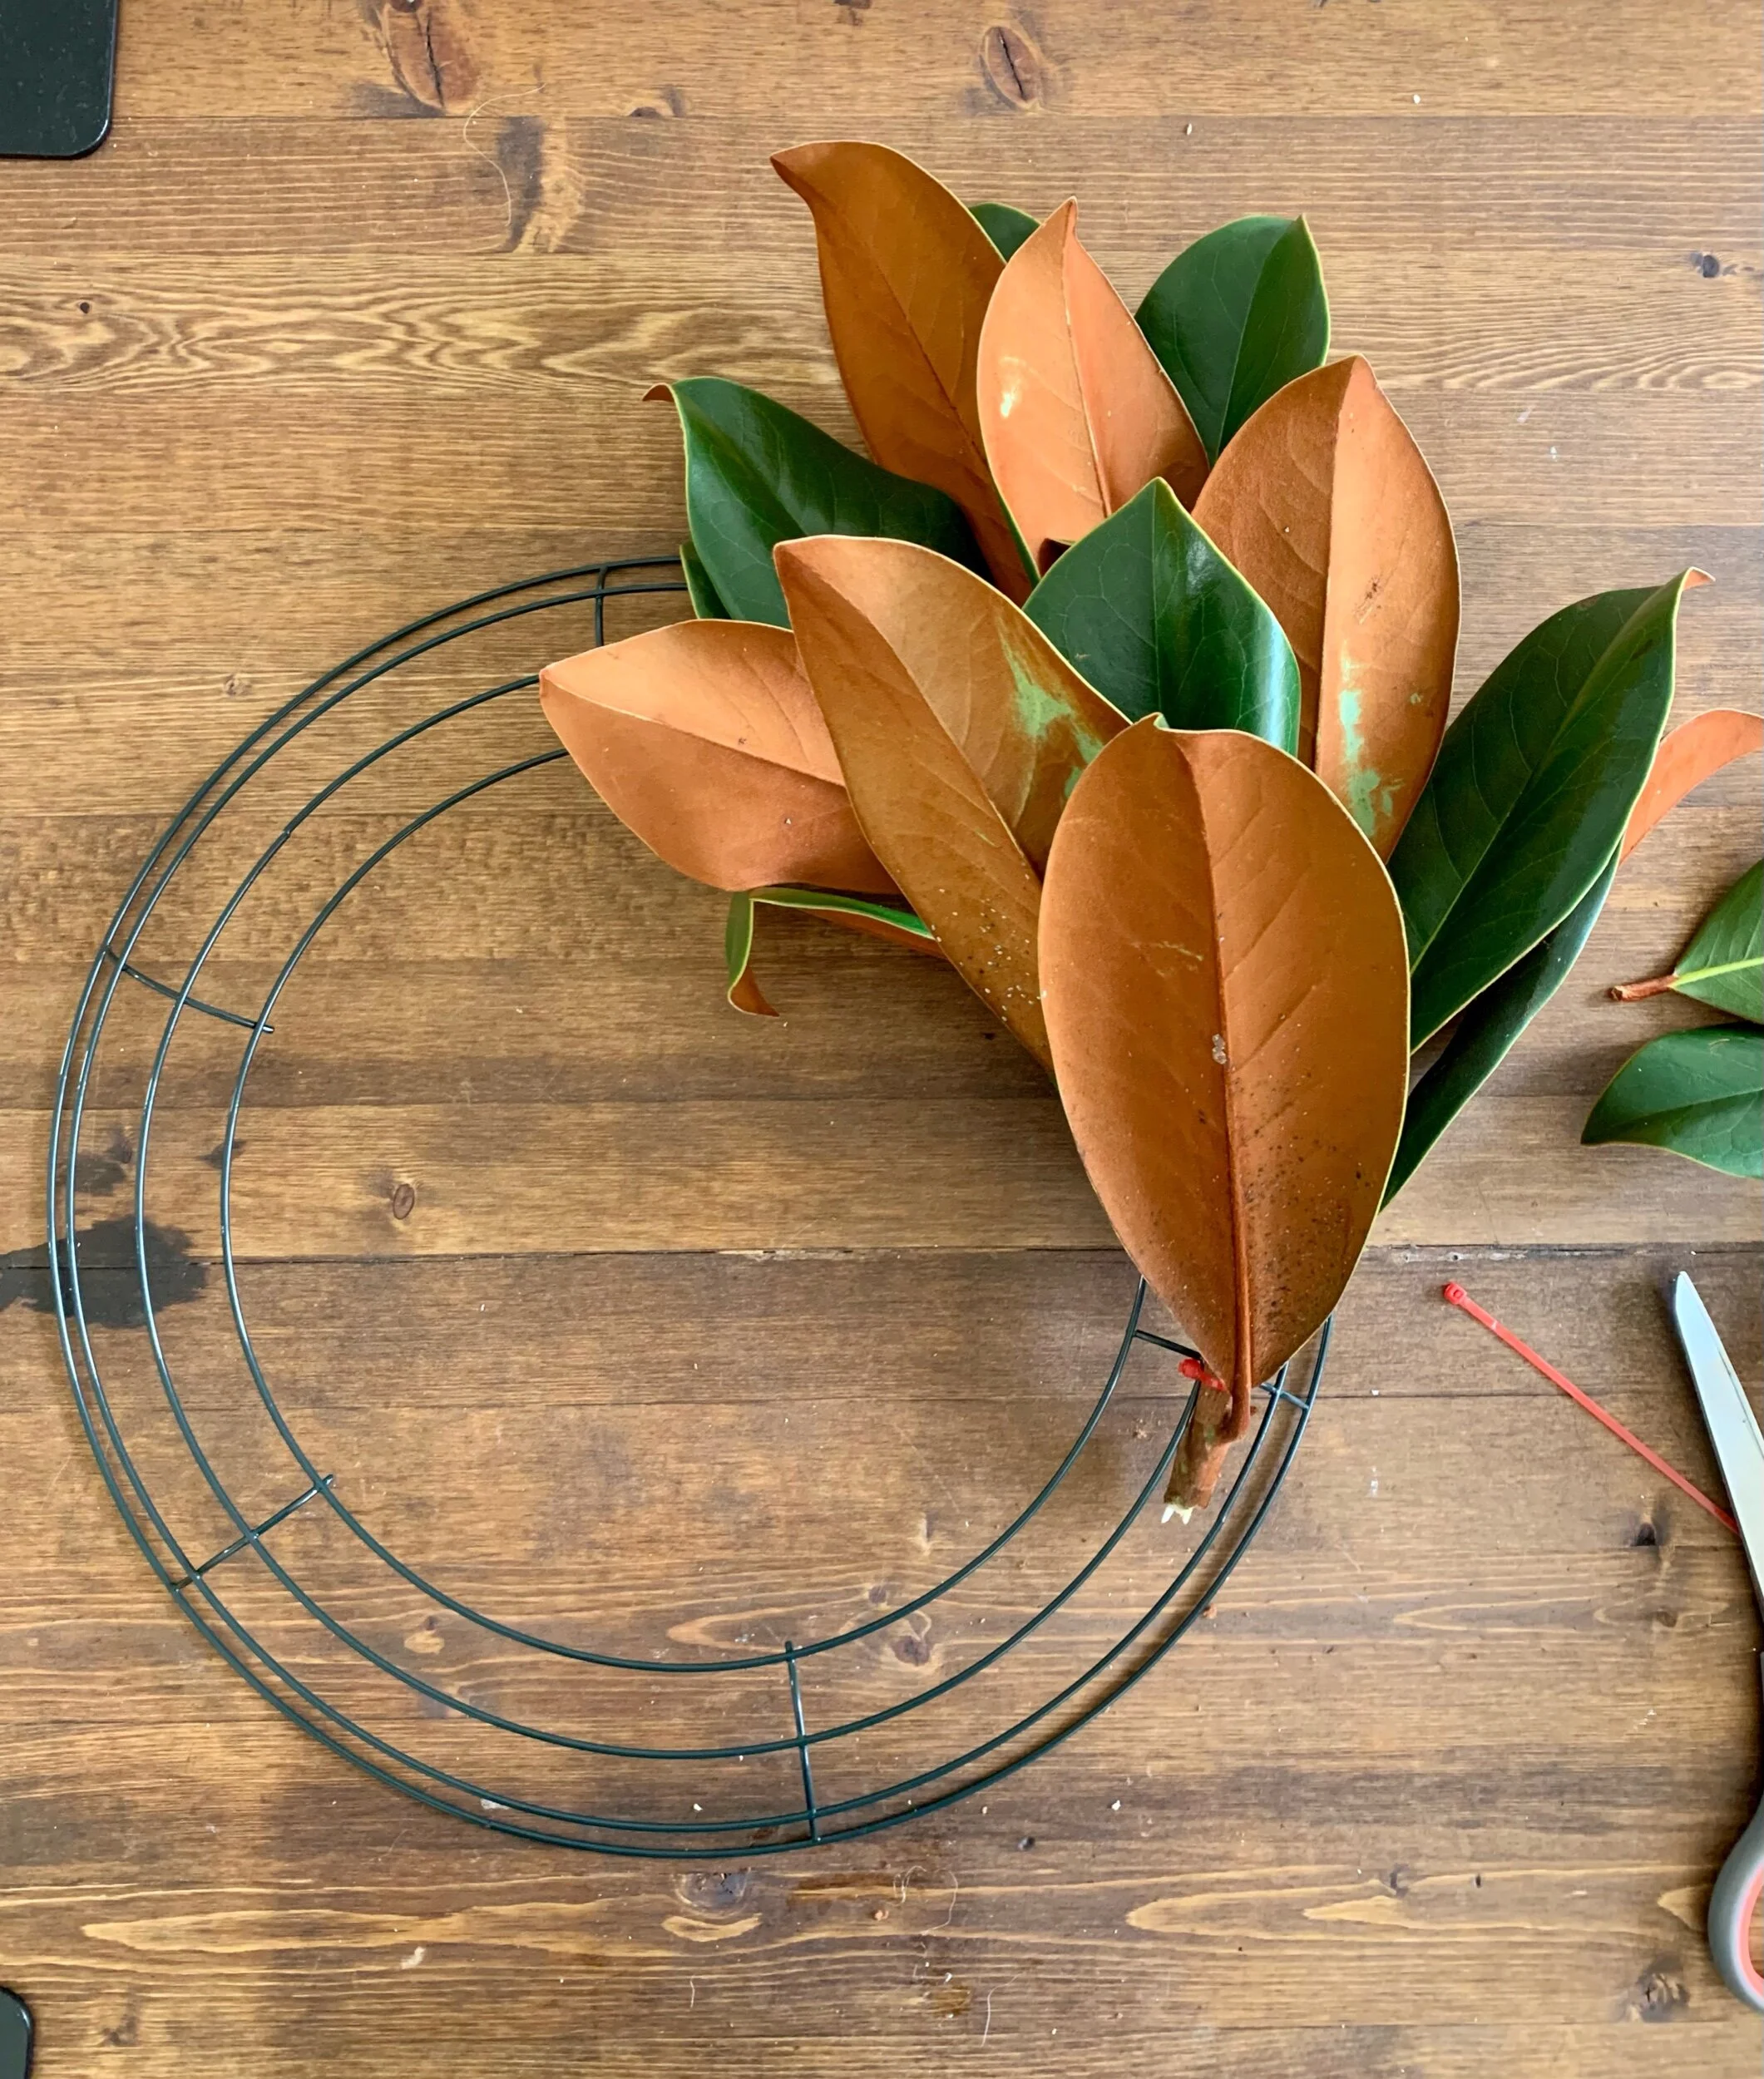
It should look like this after about 6 pieces.

IMG_1739.jpeg

Once you get the hang of the zip ties you can work pretty fast. The whole wreath took about an hour to make from start to finish. I watched some Netflix while I worked.

IMG_1740.jpeg

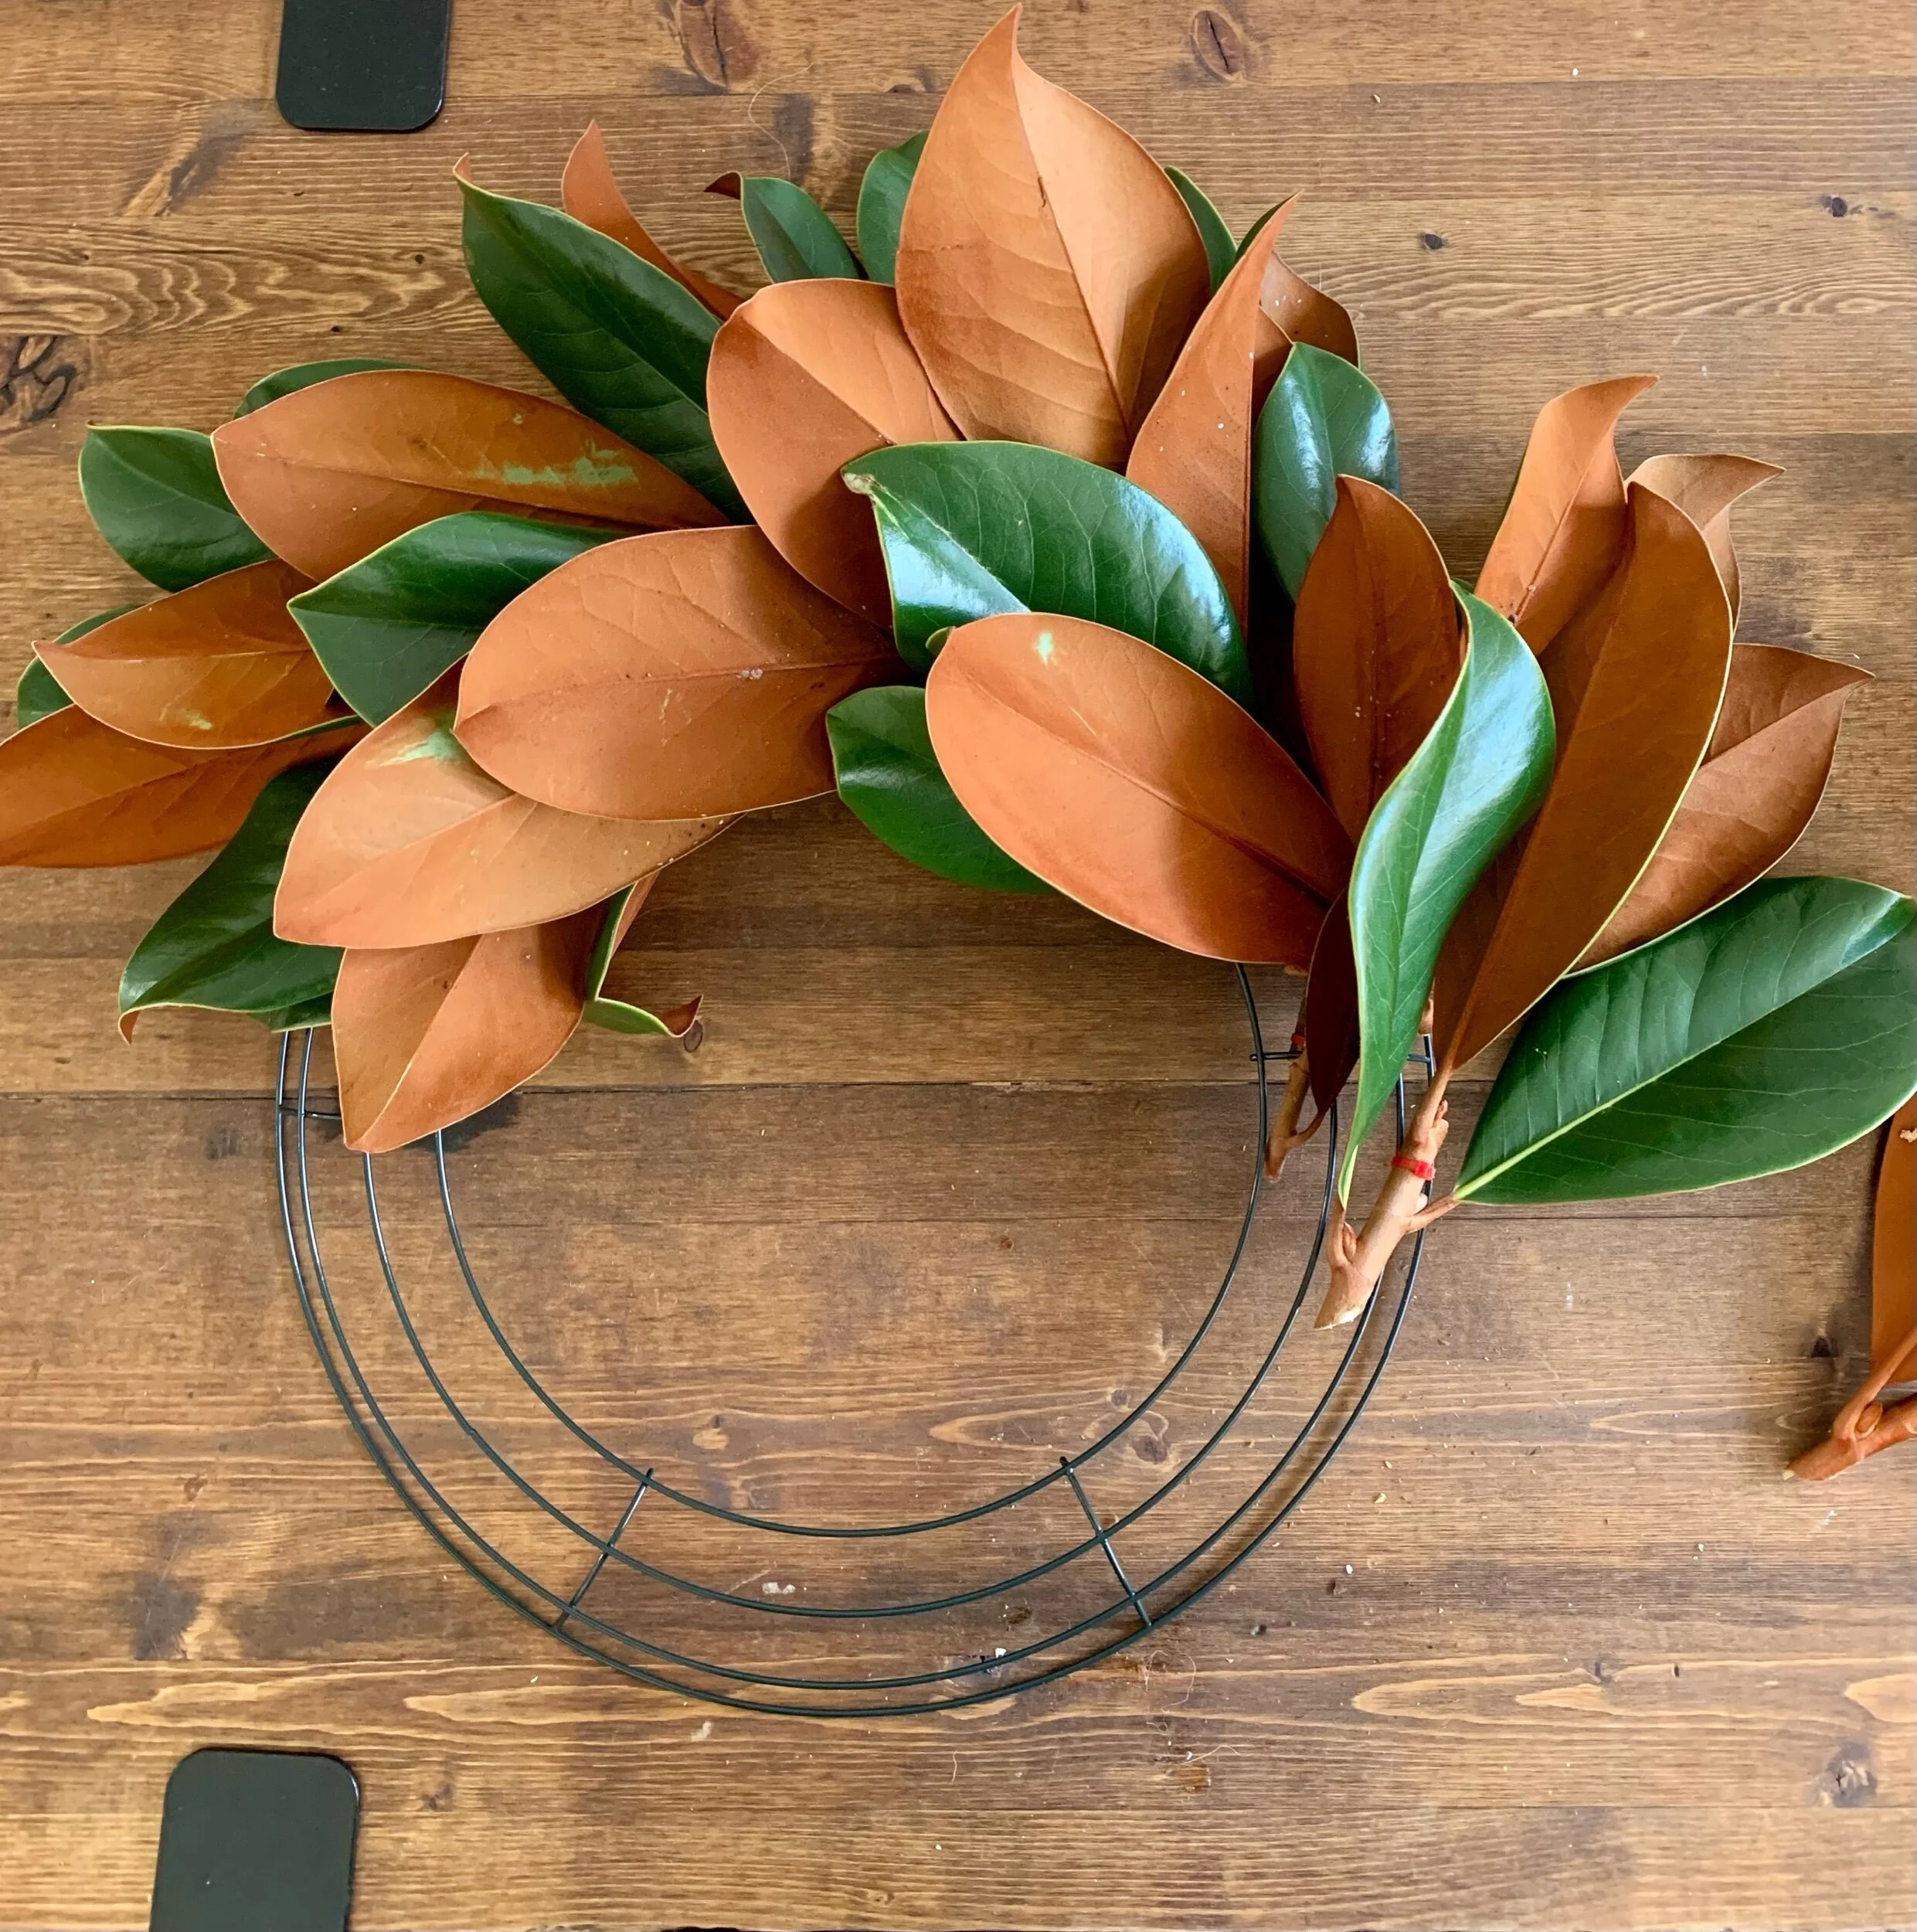
It starts looking nice and full in no time.

IMG_1741.jpeg

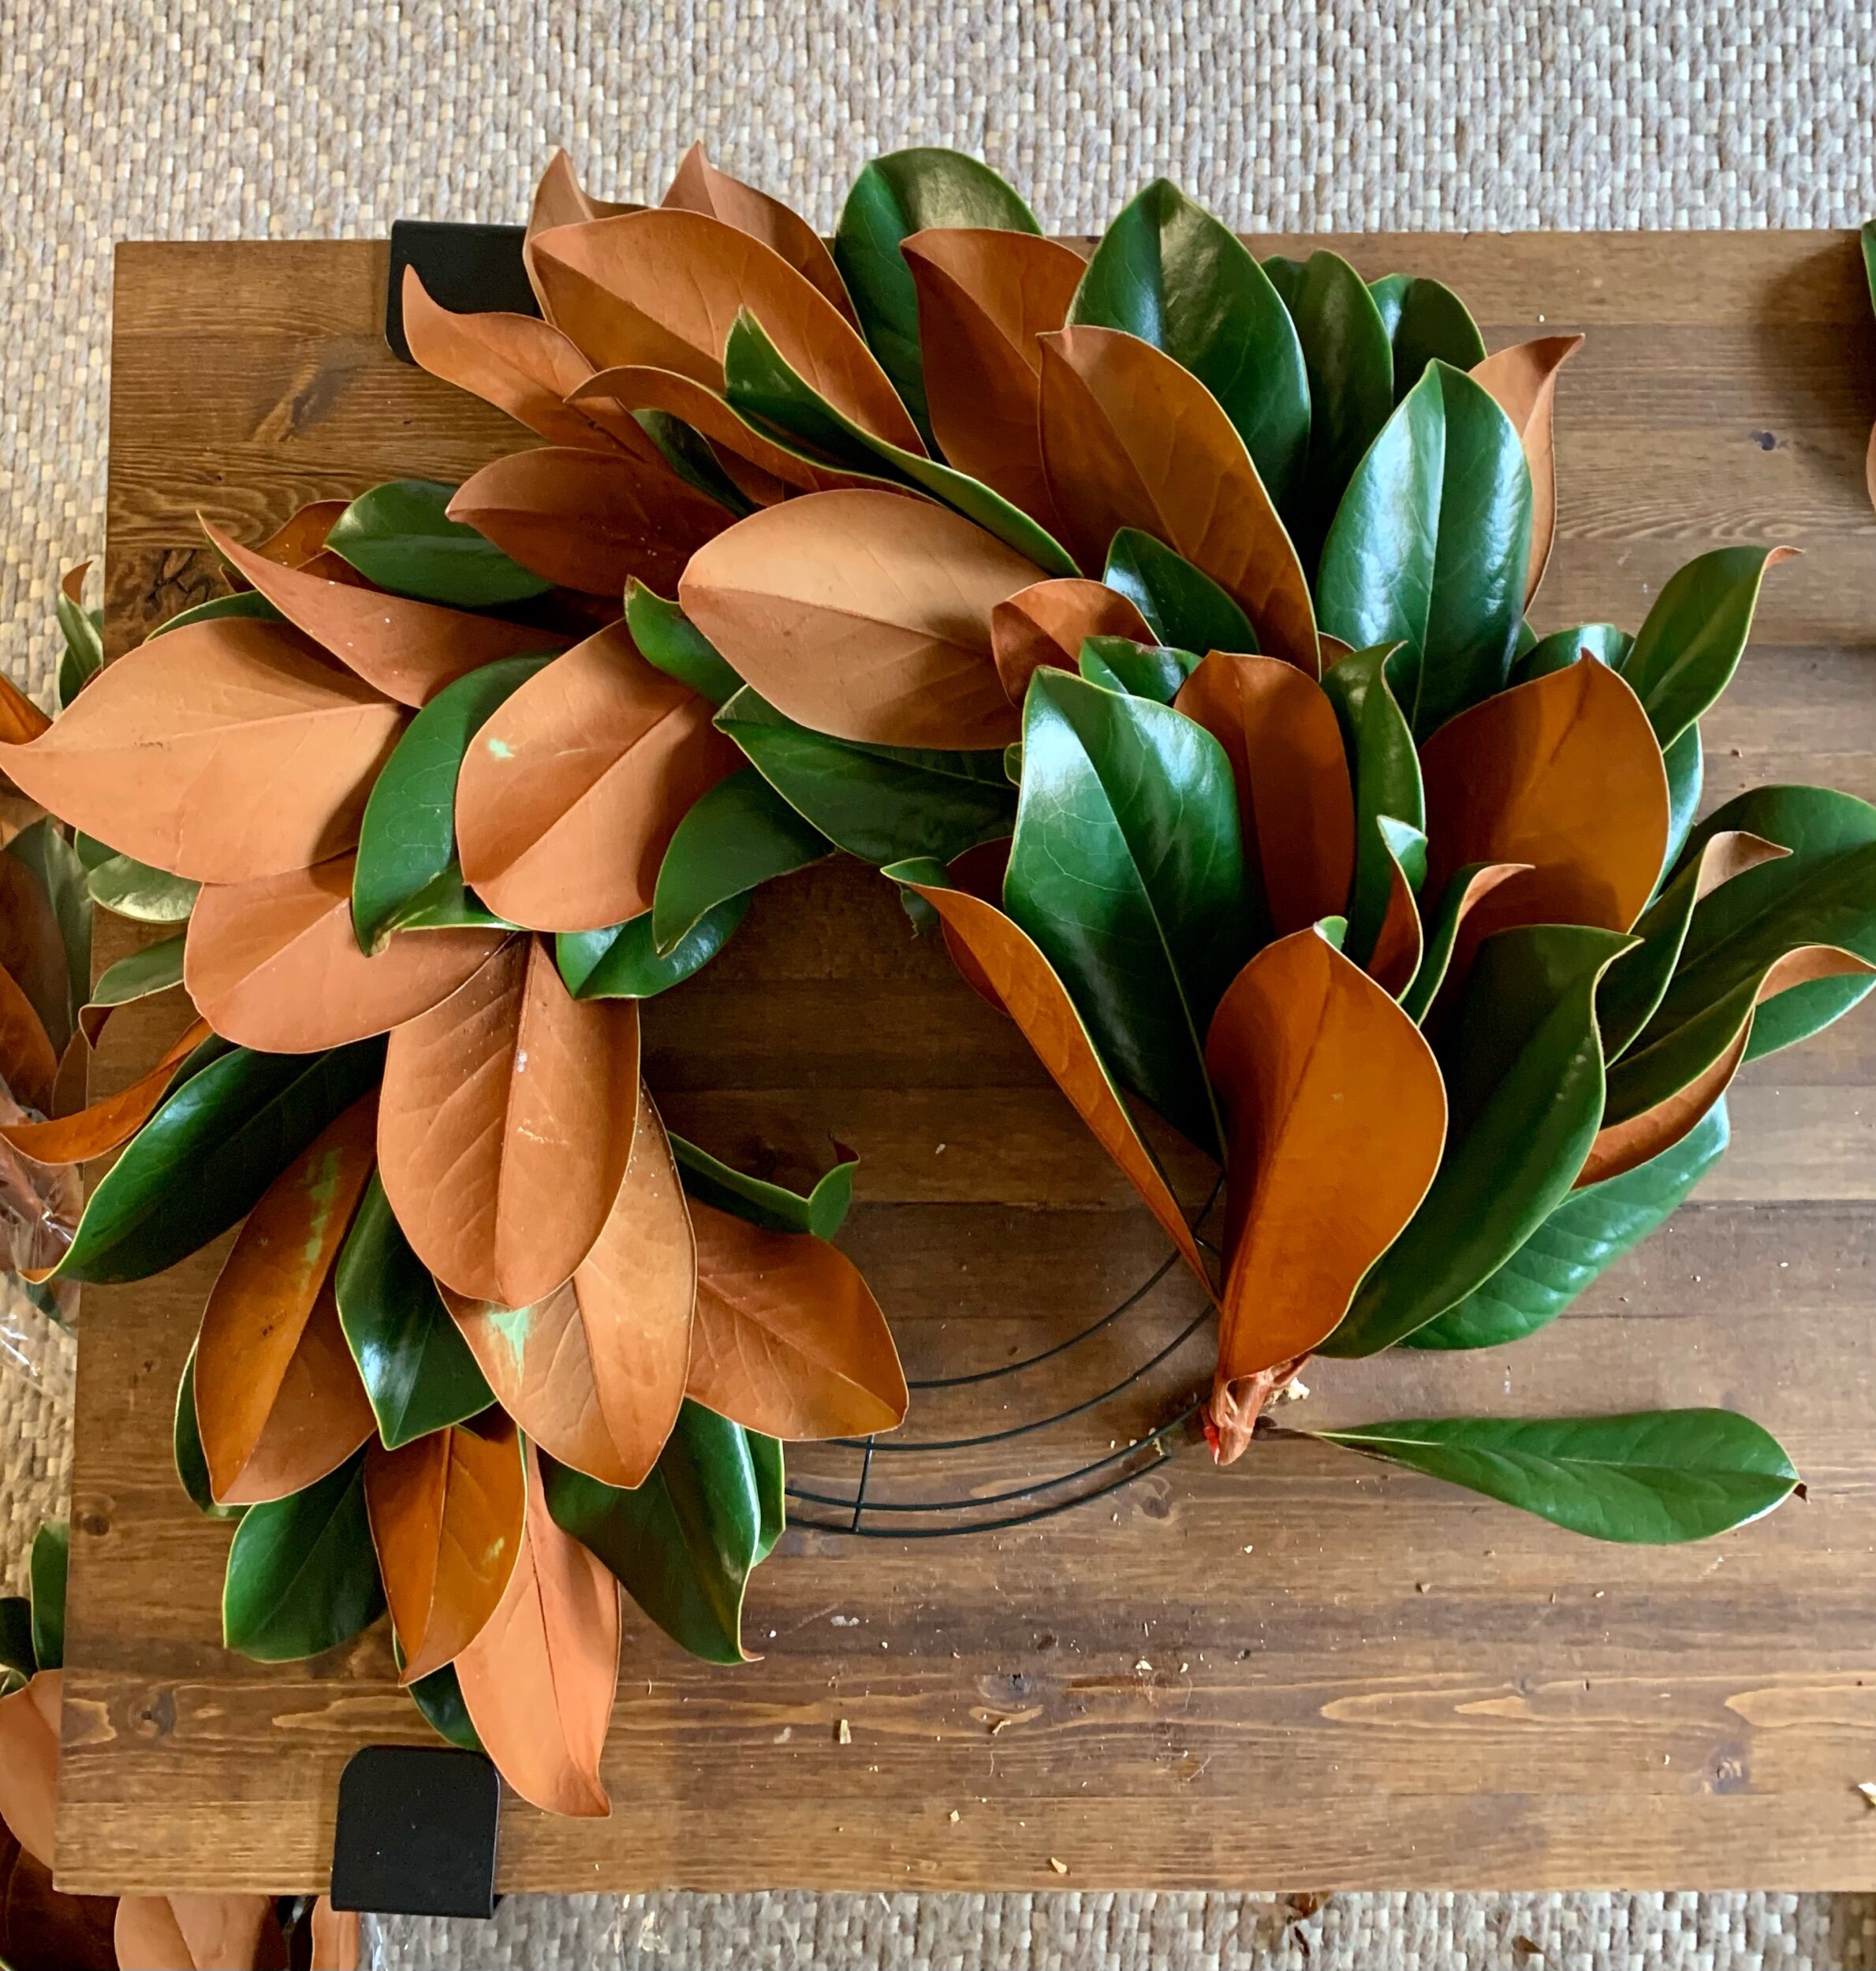
You can make your wreath look fuller by overlapping the spacing of the branches pretty close together or have it more sparse by spacing the overlap further apart. I like the top of my overlapping branch to be about halfway down the previous branch for a medium full wreath.

IMG_1742.jpeg

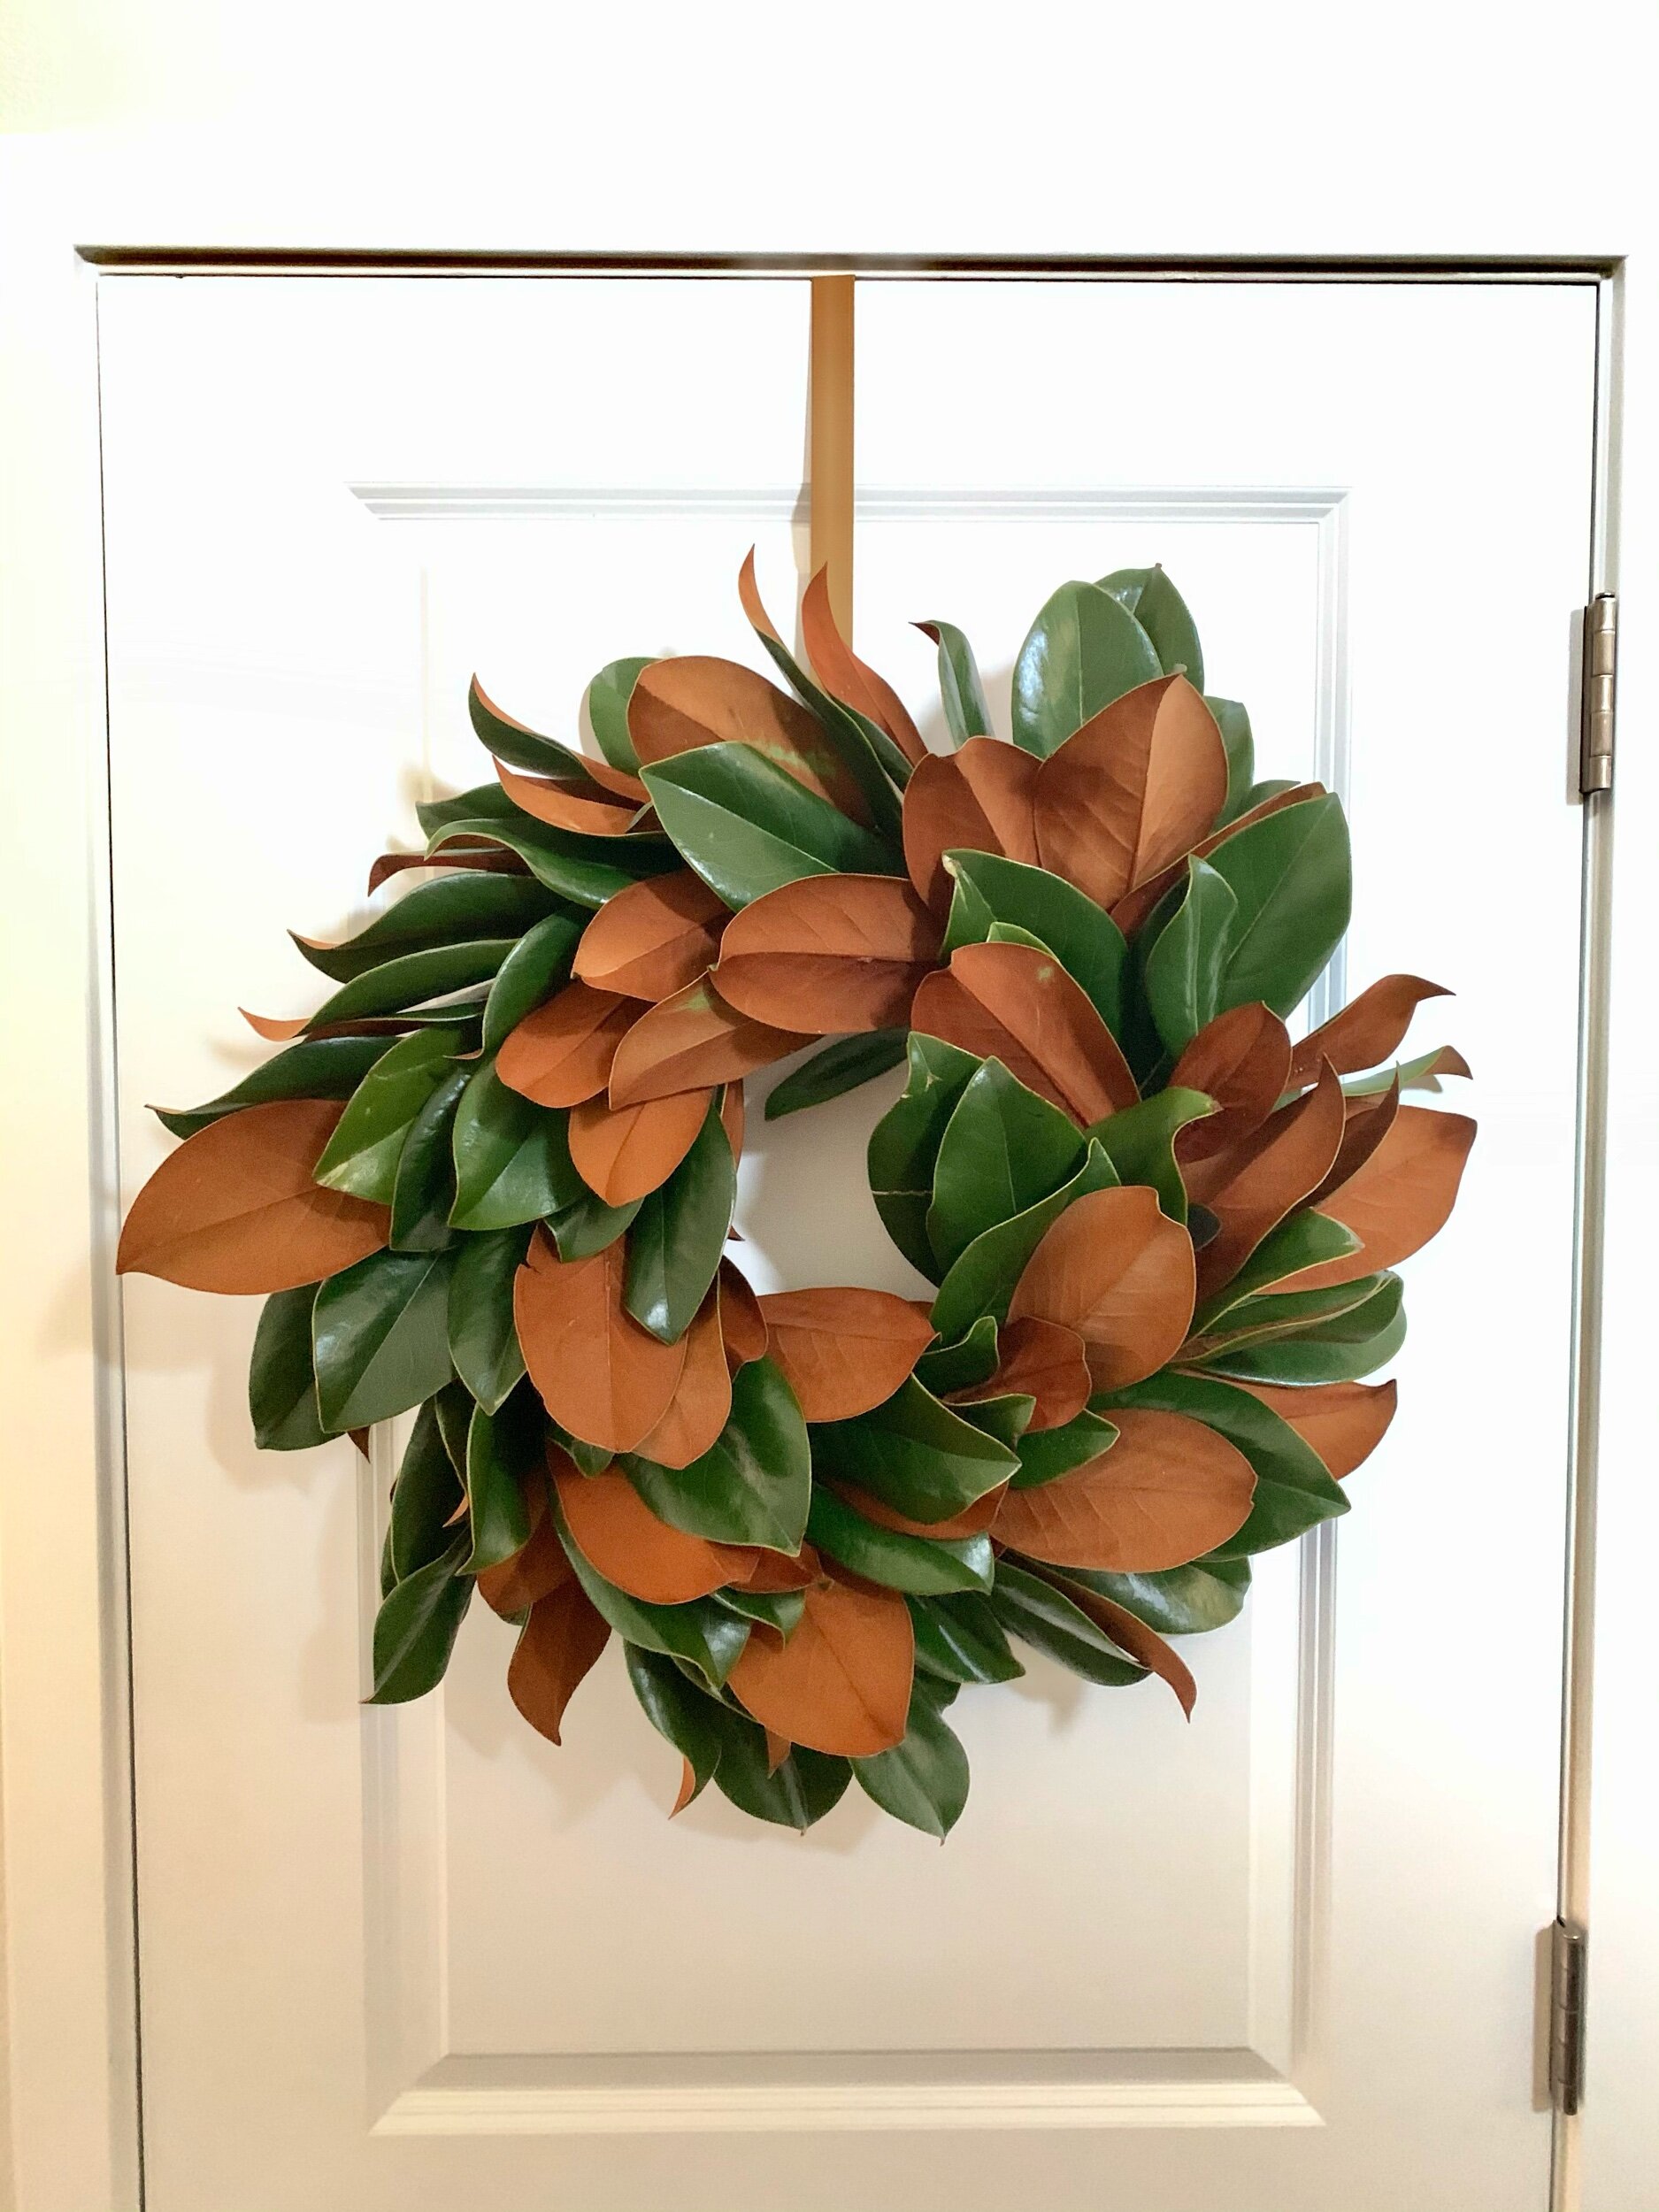
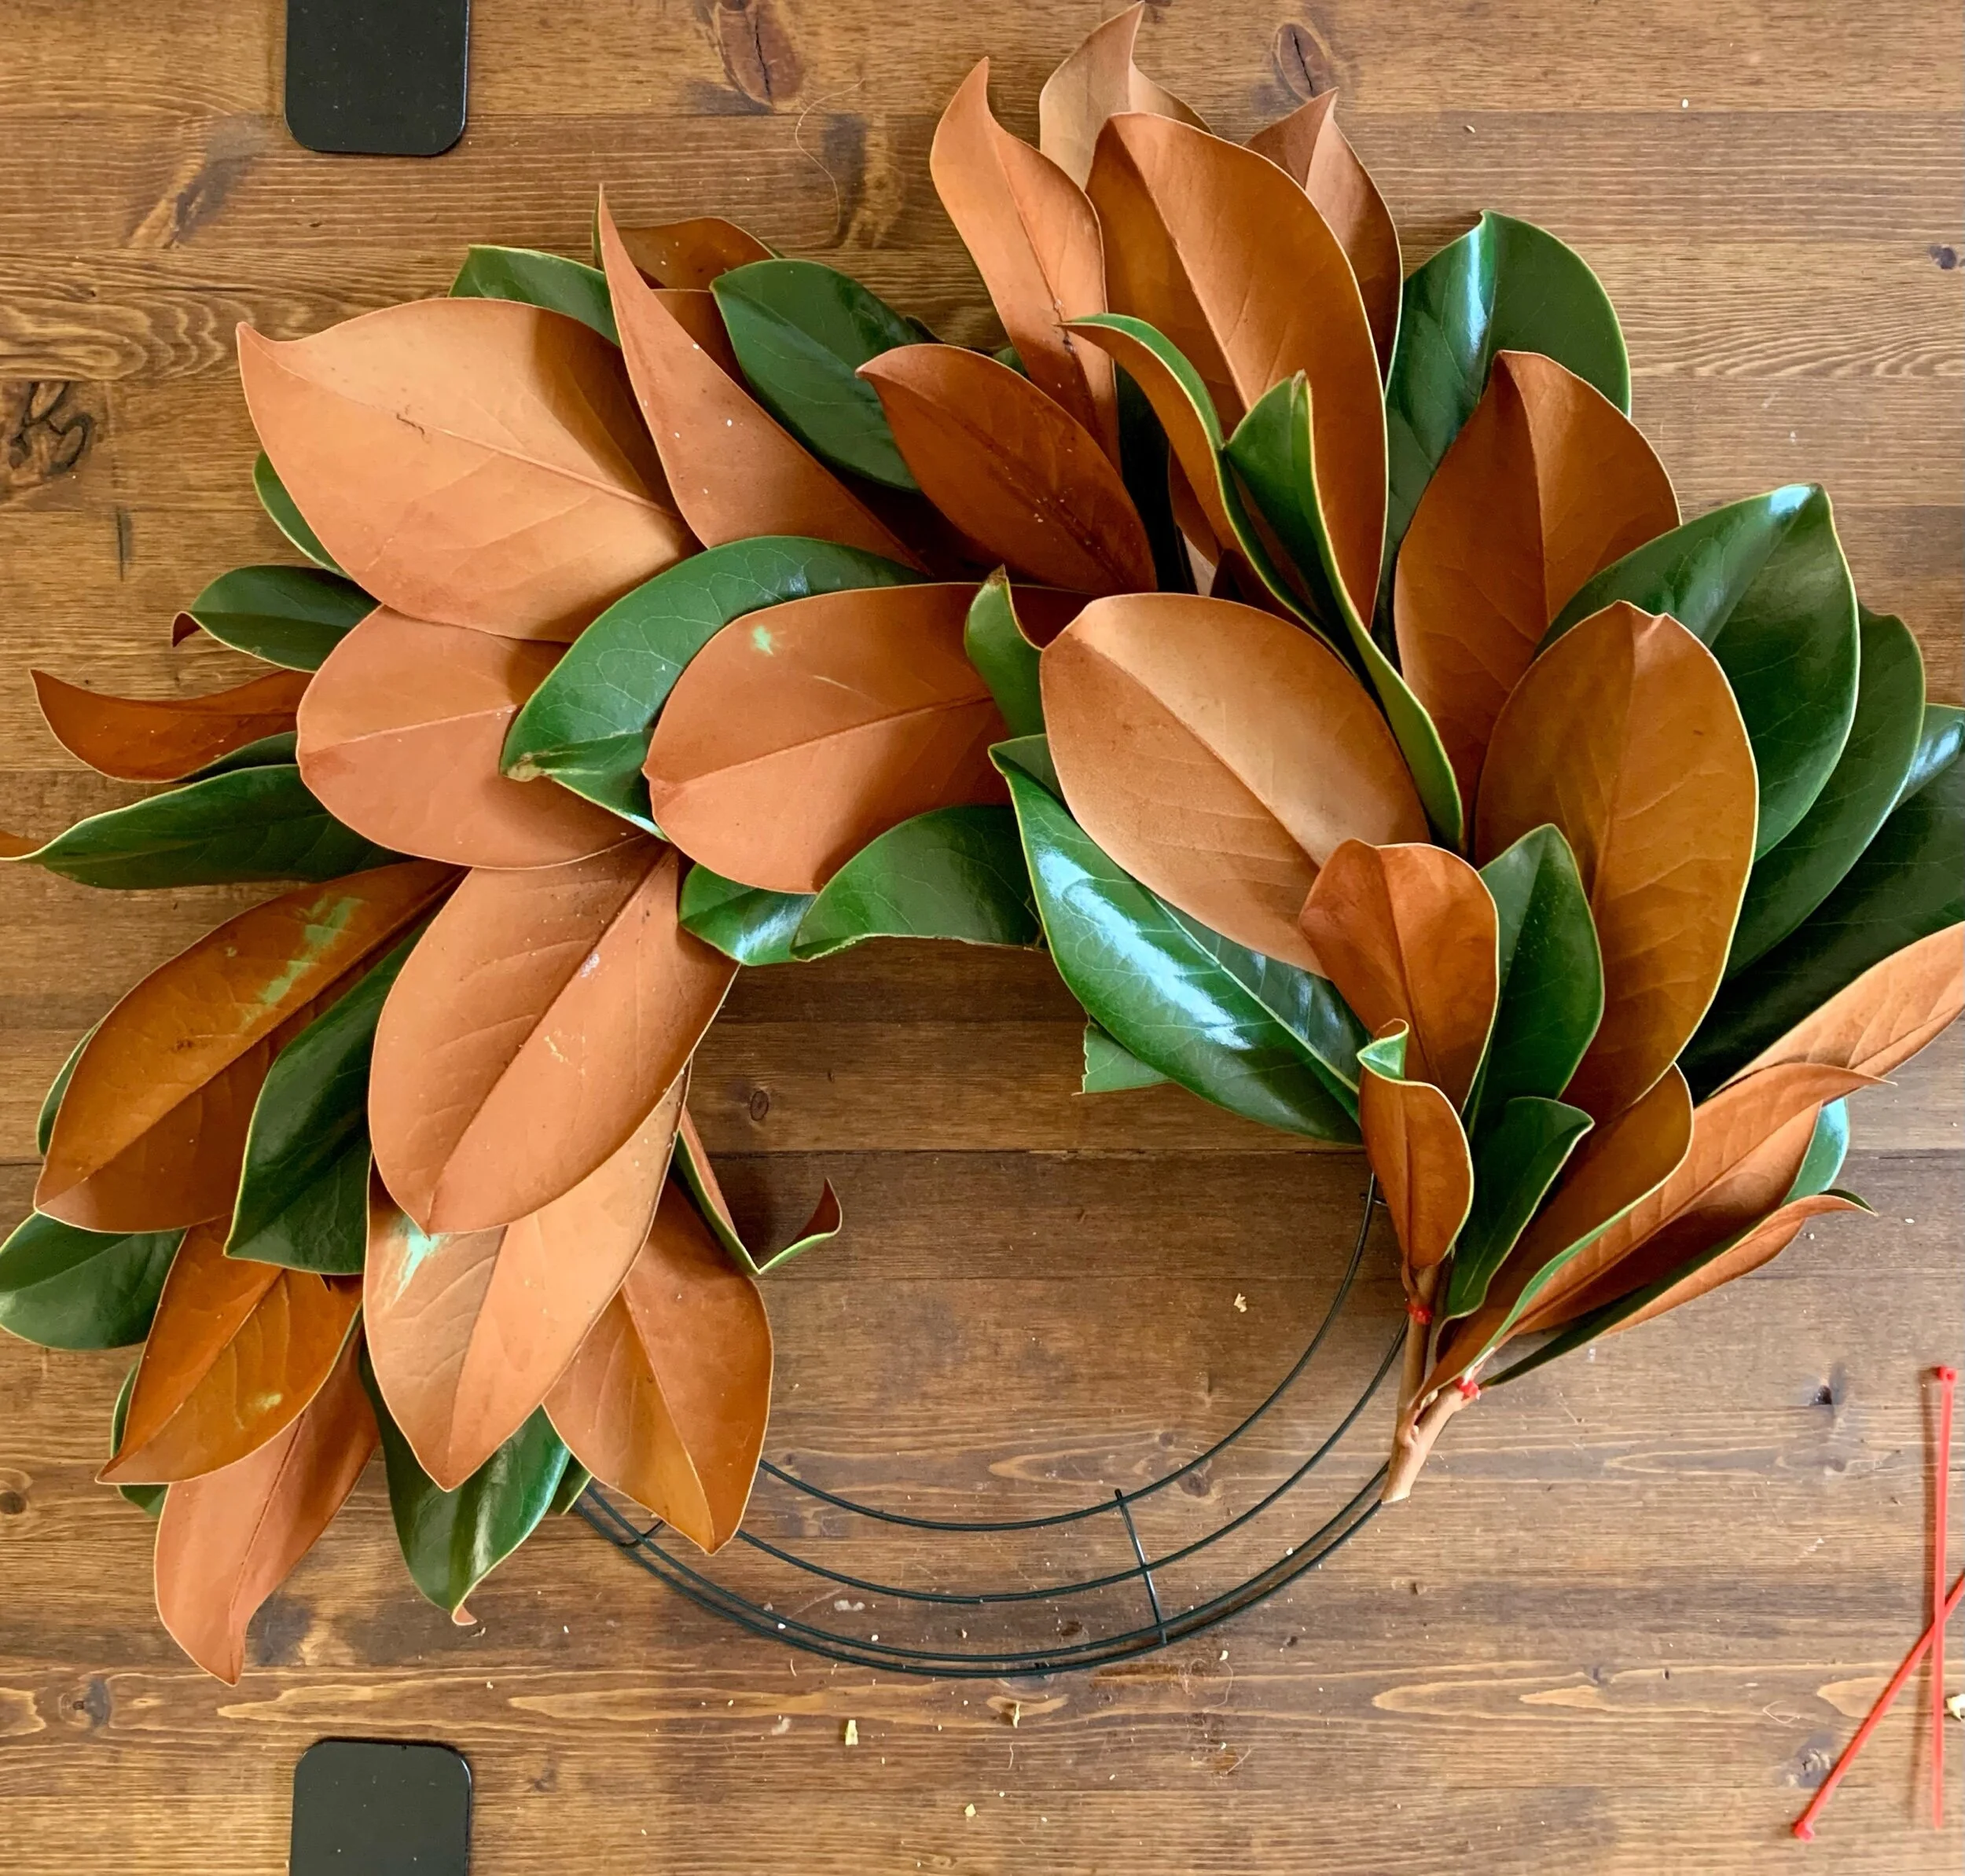
When I got to the end of filling the form with all of the branches, I made sure to tuck my last branches underneath the first branch so you couldn’t see the stem ends. Then I hung the wreath on a door and added in the individual leaves that broke off when attaching the branches in the previous steps. I used the same method as before and attached the single leaves to the wire or a branch wherever I wanted it to go.

IMG_1743.jpeg

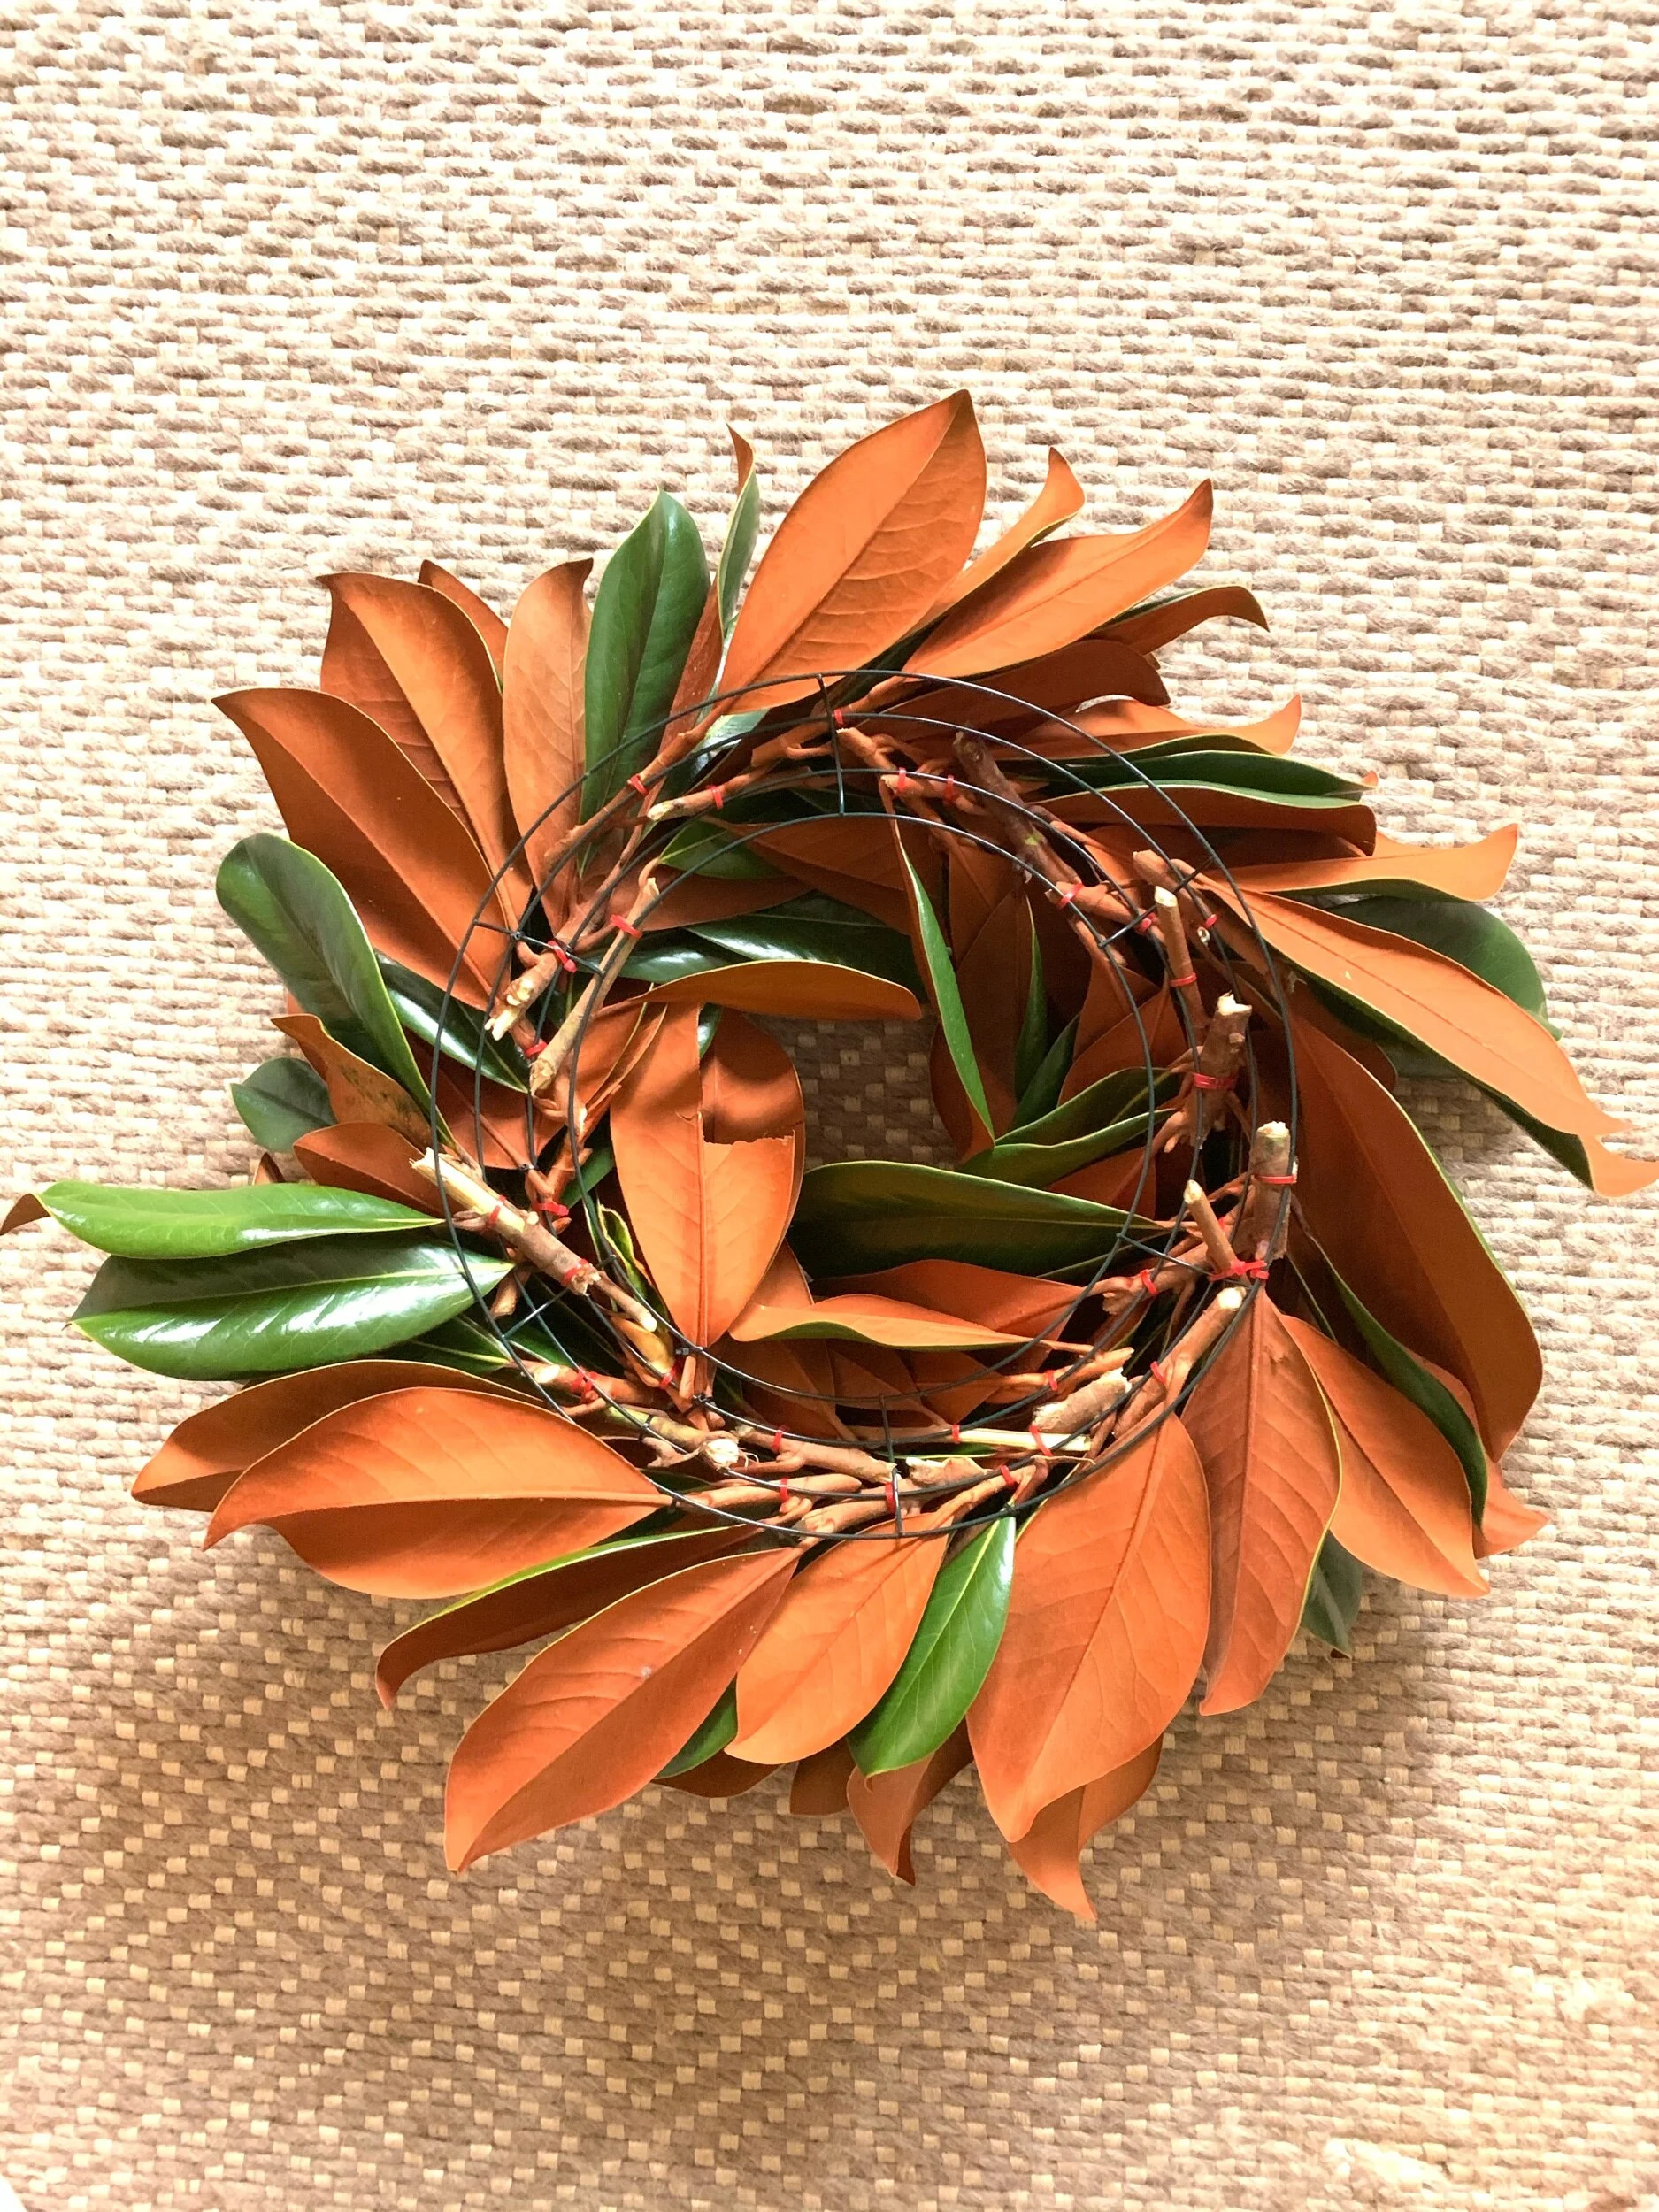
This is how the wreath looks on the backside. You can see the alternating layout pattern here and also where I wasn’t very focused because my show got the better of my attention. Even with the distractions, it turned out beautifully.

IMG_1745.jpeg
IMG_1744.jpeg

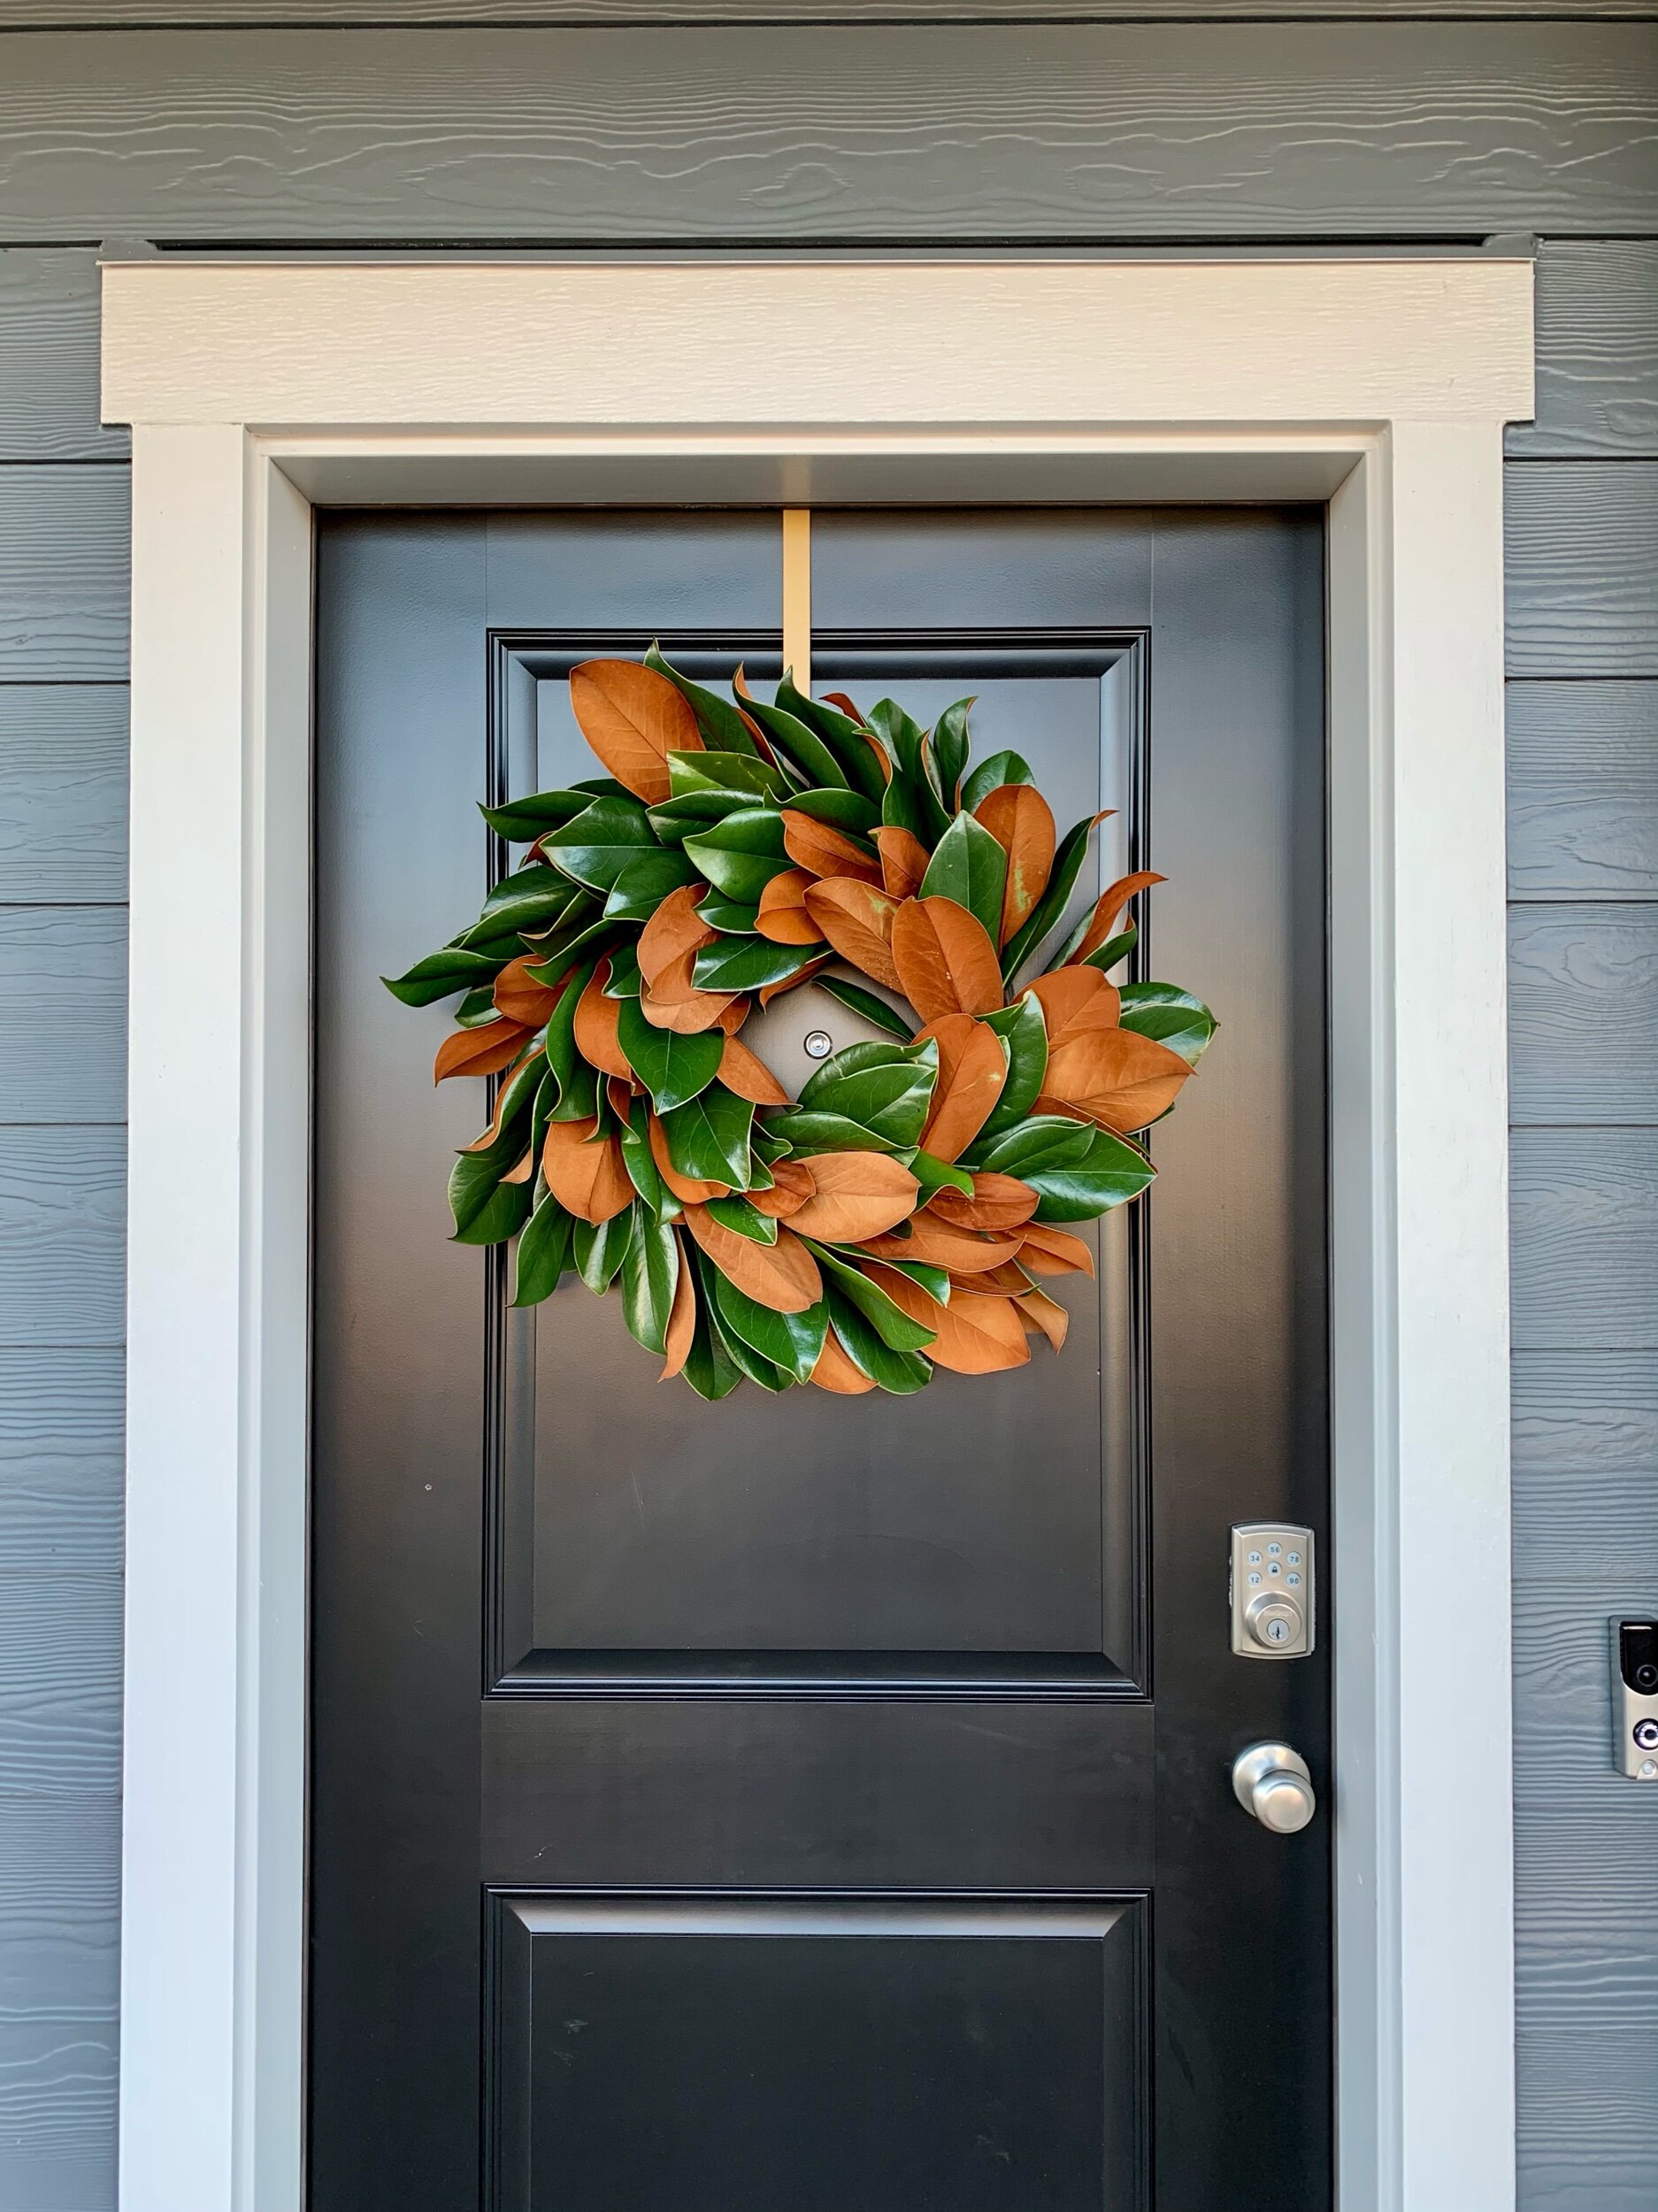
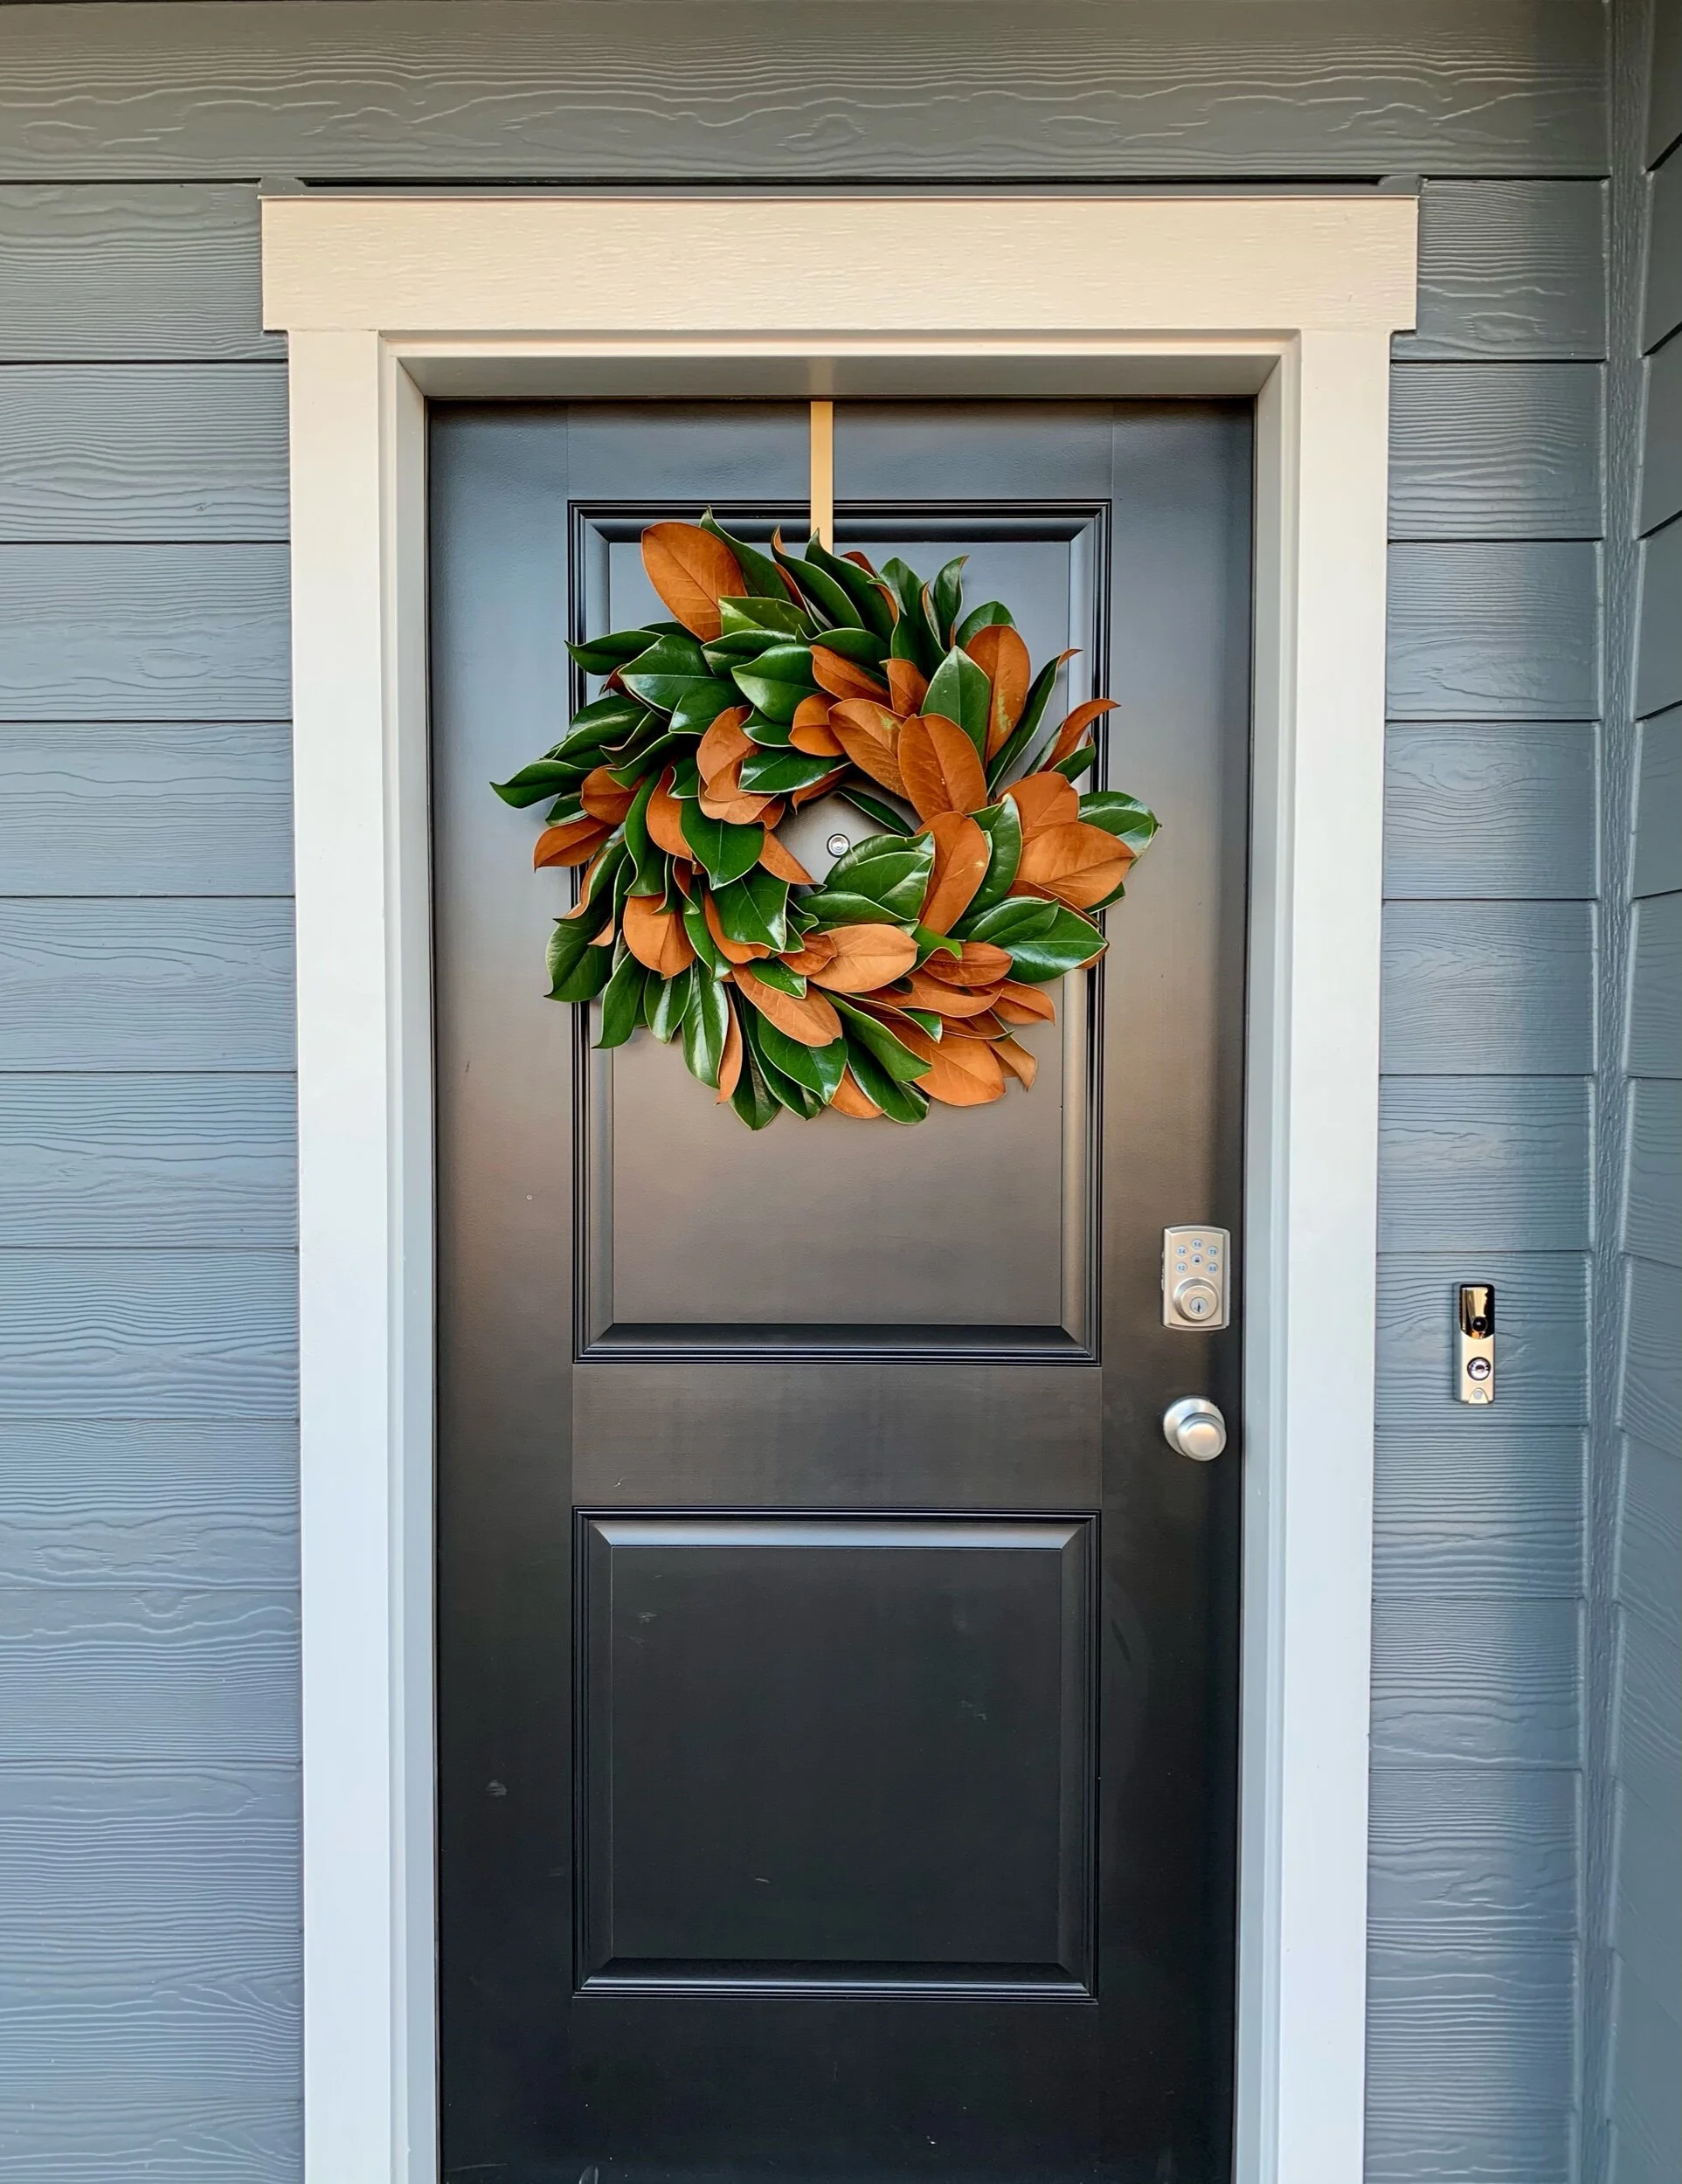
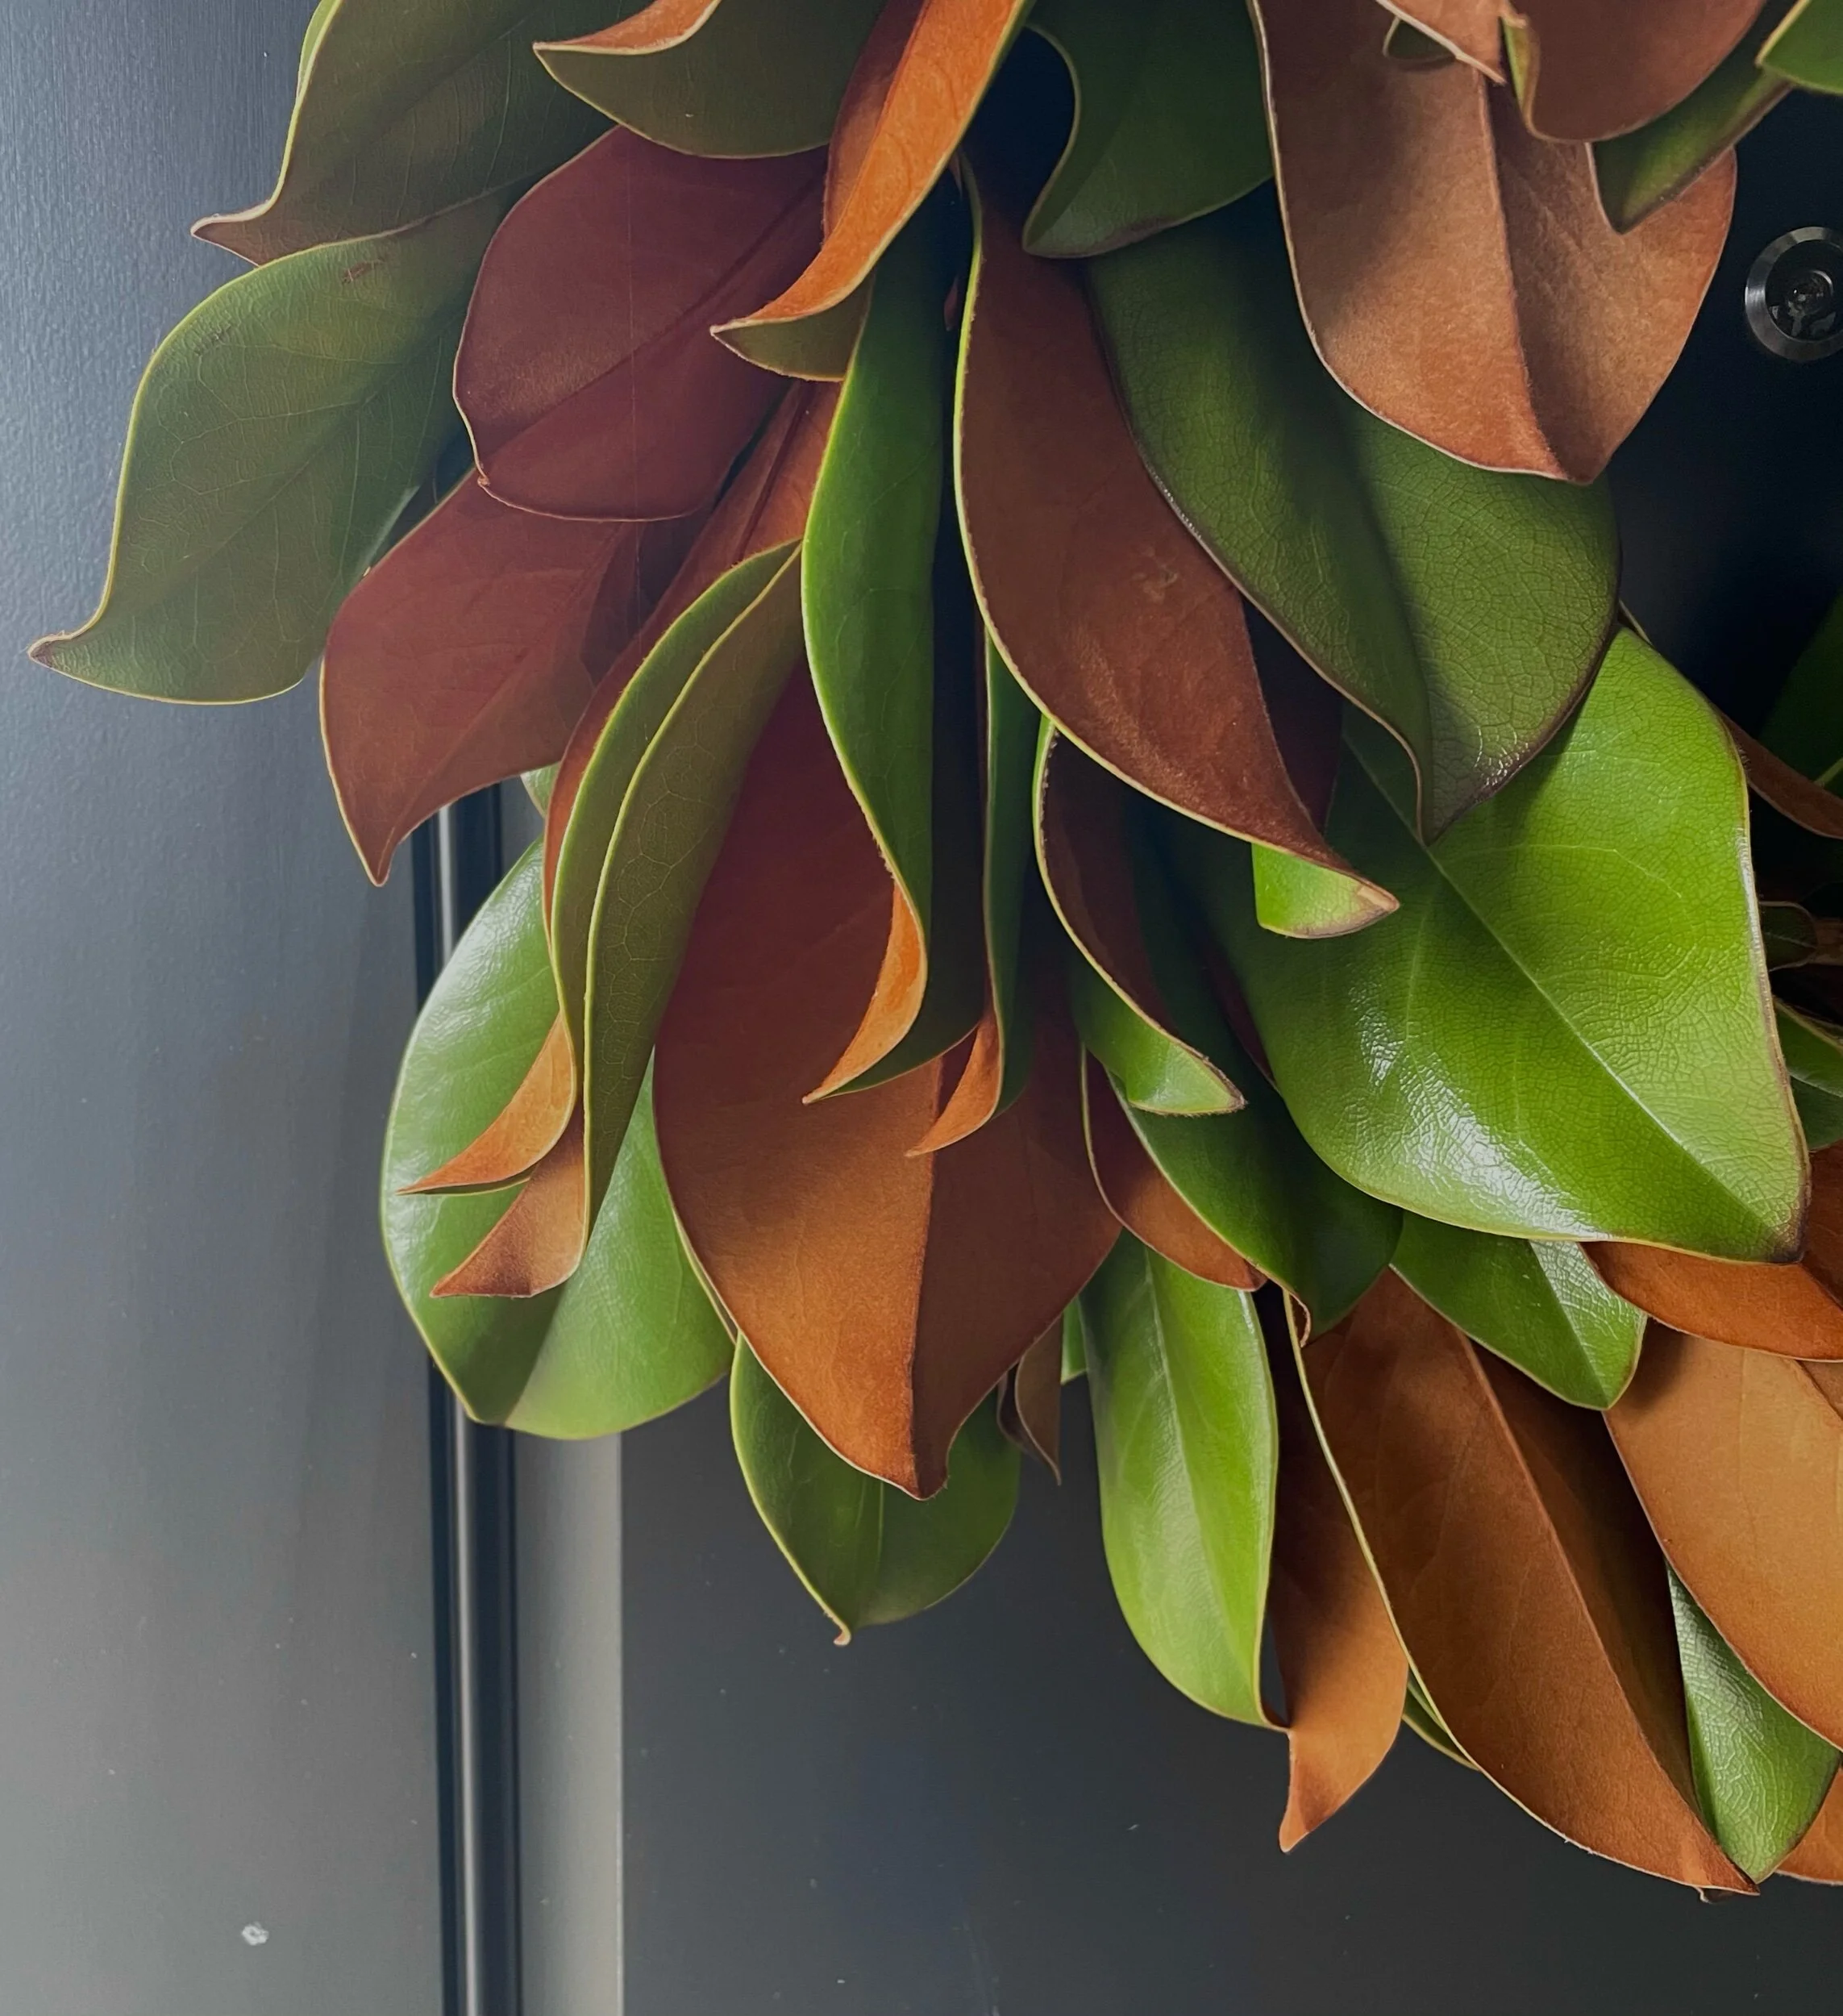
Here is the end result! I love the way it turned out. It’s simple and classic without being overly theme-y(is that even a word?) for the holidays so it can stay on the front door until hopefully winter or at least until I have time to make a winter wreath. Oh and just in case you are wondering, the blueberry frangipane tart turned out pretty great too!


ONE MORE THING! IF YOU LIKE THIS POST, LEAVE ME A COMMENT AND/OR A QUESTION. I LOVE TO HEAR FROM YOU AND GET TO KNOW YOU A LITTLE BIT MORE WITH EACH AND EVERY COMMENT.

HAVE YOU TRIED SOMETHING I SHARED? I’D LOVE TO SEE IT! JUST TAG ME ON INSTAGRAM OR USE MY HASHTAG #ABIGAILAMIRAHOME SO I CAN SEE WHAT YOU’RE UP TO!

In Interiors Tags DIY, Diy project, project, fall decor, fall, Magnolia, Magnolia wreatj, magnolia wreath, wreath, fall wreath
← Great Gifts For The Whole Family At WalmartCurrent Favorites - Everlane →

Welcome friends!

I'm Amy Bennett, the creative behind the Abigail Amira Home Blog. I want to share with you my simple lifestyle & design tips as well as things that inspire me!

Follow along with me!

Subscribe

Sign up with your email address to receive news and updates.

We respect your privacy.

Thank you!
Featured
What I'm Wearing Wednesday 08/13/2025
Aug 13, 2025
What I'm Wearing Wednesday 08/13/2025
Aug 13, 2025

Denim on denim is trendy this season! Are you on board with this look? I’ve paired a denim vest with a mini skirt, open-toed block heels, a mini crossbody bag, and a fabulous scarf to complete the outfit. Would you try this look?

Read More →
Aug 13, 2025
Lounging In The Sunroom
May 19, 2025
Lounging In The Sunroom
May 19, 2025

Sunrooms connect indoor and outdoor areas. Due to their resilience, I recommend selecting durable outdoor materials such as teak, aluminum, and resin wicker when choosing lounge furniture for this space. Creating a cozy atmosphere will enhance your sunroom's beauty while protecting your furniture investment.

Read More →
May 19, 2025
Friday Favorites 05/16/25
May 16, 2025
Friday Favorites 05/16/25
May 16, 2025

I've started an exercise to focus on positivity and bring happiness into my life and those around me. I tend to dwell on the negatives, but I'm determined to retrain my brain. So, I am sharing 16 things that have made me happy in a series called "Friday Favorites" to inspire joy in others.

Read More →
May 16, 2025


Walmart+ Free delivery from your store! Groceries & more delivered as soon as today, at the low prices you love. $35 order min. 15-Day Free trial!

Walmart+ Free delivery from your store! Groceries & more delivered as soon as today, at the low prices you love. $35 order min. 15-Day Free trial!


Elevate your house from home at ScoutandNimble.com!

Powered by Squarespace